How Axe Heads Stay On (Illustrated)
There are a couple of ways axe heads can be attached but the most common method uses a wooden wedge to secure it to the handle.
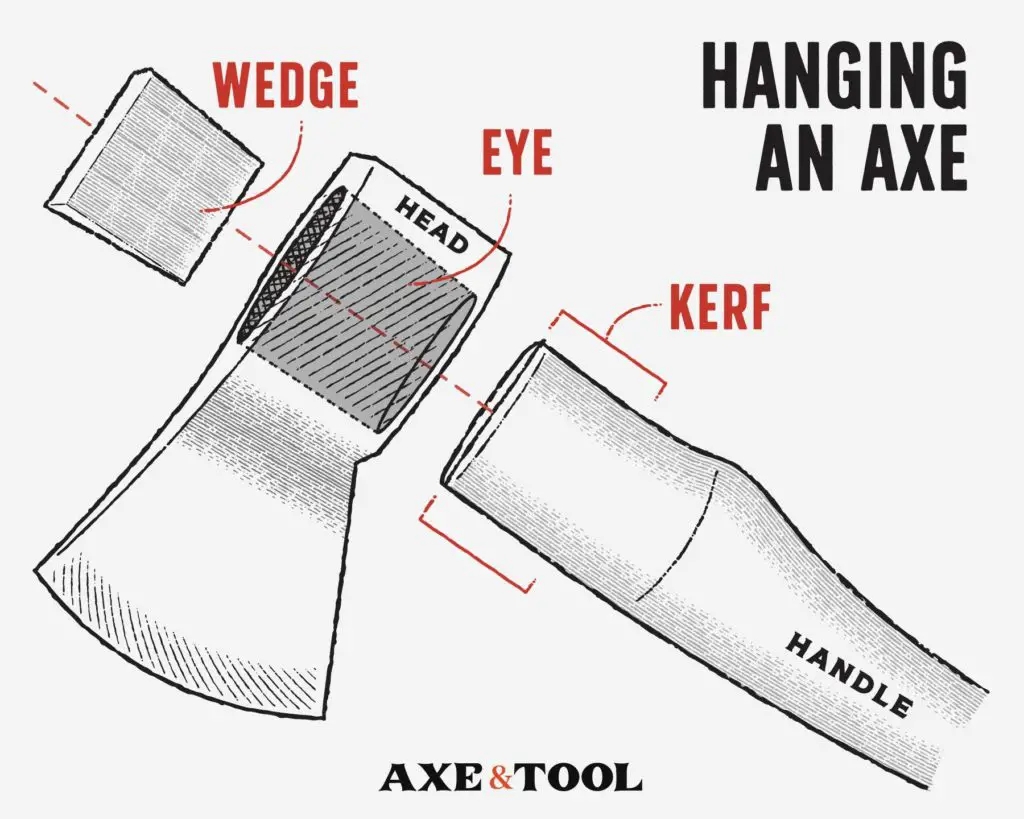
Axe heads stay on with friction. Most commonly a handle with a slotted end (kerf) is shaped and fitted snuggly to the eye of the axe. Then a wood wedge is hammered into the slot, pressing the handle against the head locking it in place. But there is also a slip-fit method.
How a Wedge Keeps an Axe Head On
This is the primary way most axes are assembled today.
1. The handle is shaped and fitted to the head
The business end of the handle is shaped to go all the way through the eye of the axe (the hole in the axe head) and extend out the other side. The handle gently widens out below the head so it can’t slide any further down. This fitting can be the hardest part of the process.
There is usually a lot of adjusting and tweaking when shaping the handle to get the head seated perfectly centered in all directions (left/right, up/down, and front/back), this process is called “hanging”.
Ever heard the phrase “getting the hang of it”? That refers to the trial and error process of hanging an axe.
These days most mass production axes are seated with a hydraulic press to save on skilled labor time and cost and time. This means the handles only need to be roughly shaped to be fitted, but it can also lead to some messier hangs.
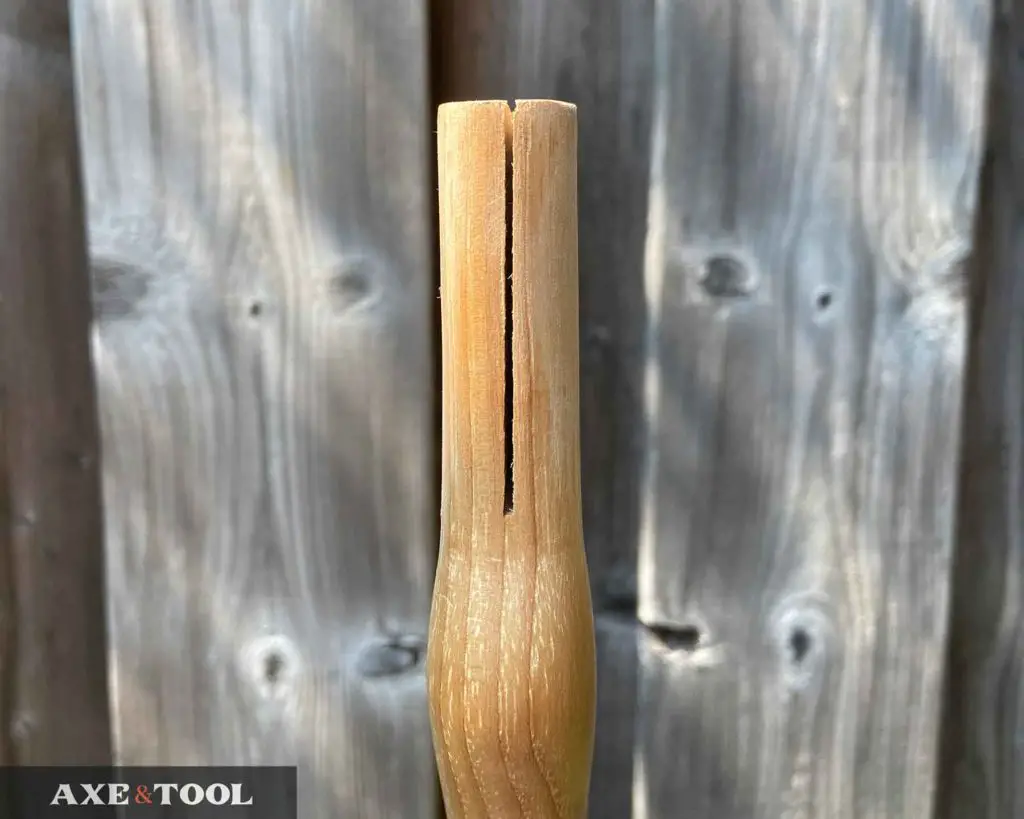
2. The kerf is cut in the top of the handle
There is a slot cut down the center of the handle (front to back), that goes down about ⅔ of the way down into the head. This is called the kerf.
3. The head is seated on the handle
The head is then firmly pressed onto the handle. First by hand, and then snuggly seated by giving the bottom of the handle a couple of good whacks with a mallet.
4. A wood wedge is hammered into the kerf
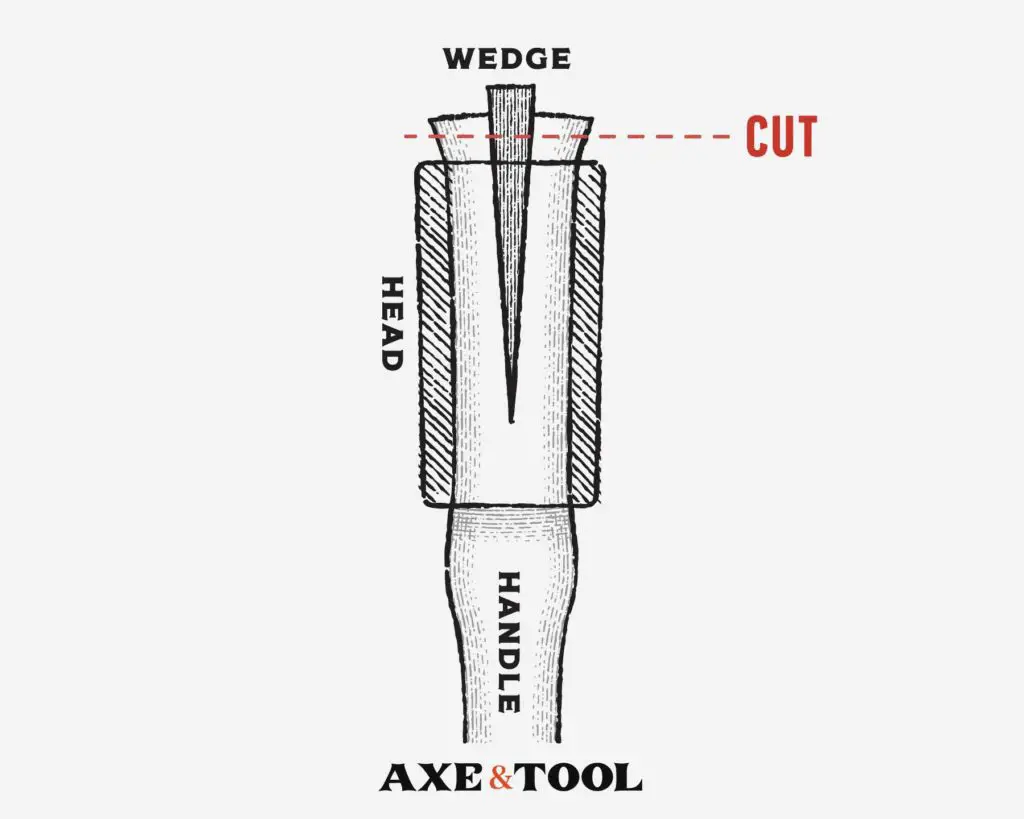
The eye of the axe head is slightly tapered with the hole at the bottom being smaller than the top.
The wider eyehole at the top of the head leaves enough room to hammer a wooden wedge into the kerf once the head has been seated onto the handle.
The two sides of the handle are pushed apart by the wedge, this puts pressure on the inside of the axe head – holding it in place.
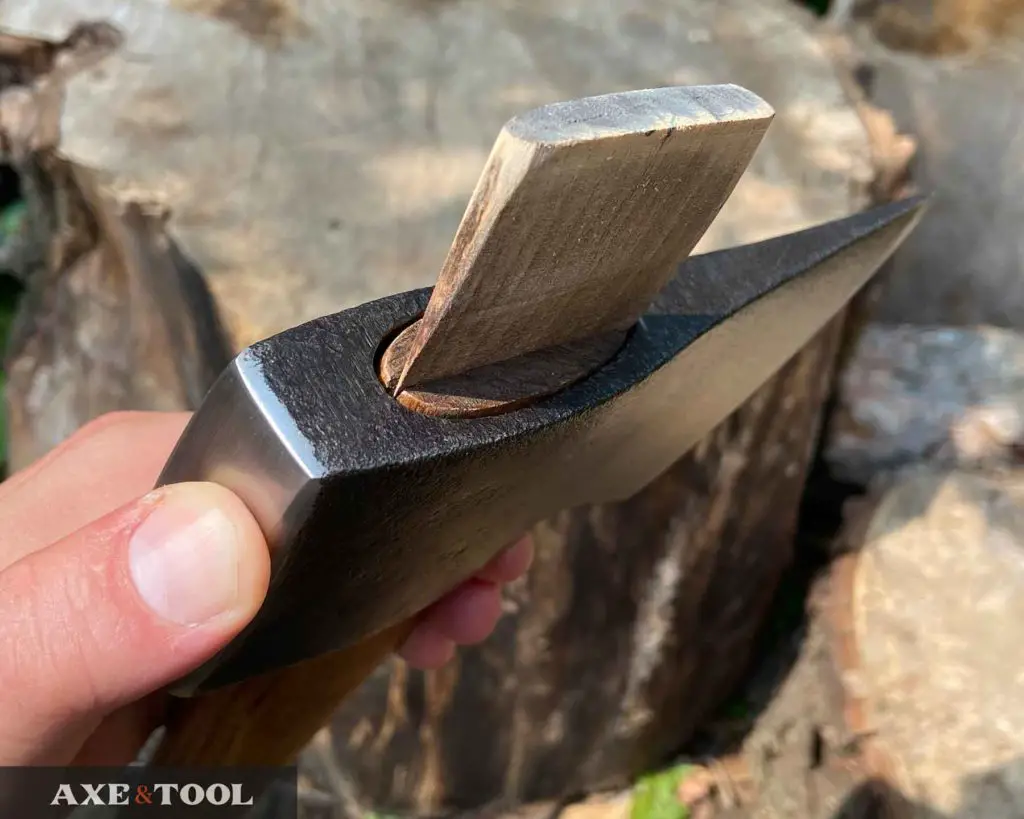
5. The excess wedge and handle are trimmed
The top of the handle can be cut down flush with the axe head and still not budge. Often an eighth to a quarter inch is left sticking out. This is known as being left “proud”.
The benefit of a “proud” handle is that it acts as an additional stopper should the head loosen for any reason. So no chance of the head flying off.
Note: you will sometimes find large aluminum wedges used instead of wood wedges.
6. Oils and cross wedges are used to prevent loosening
Now that the wedge is in, the head will stay on. But there are a few finishing touches used to keep it there.
Oiling the handle and soaking the eye with boiled linseed oil (or similar) will help the head stay fixed. The oil that is absorbed will swell the wood and make it more resistant to the elements. This stops the handle from drying out and shrinking.
Finally, a metal step or barrel wedge may be hammered horizontally across the wooden wedge to force additional pressure on the axe’s eye.
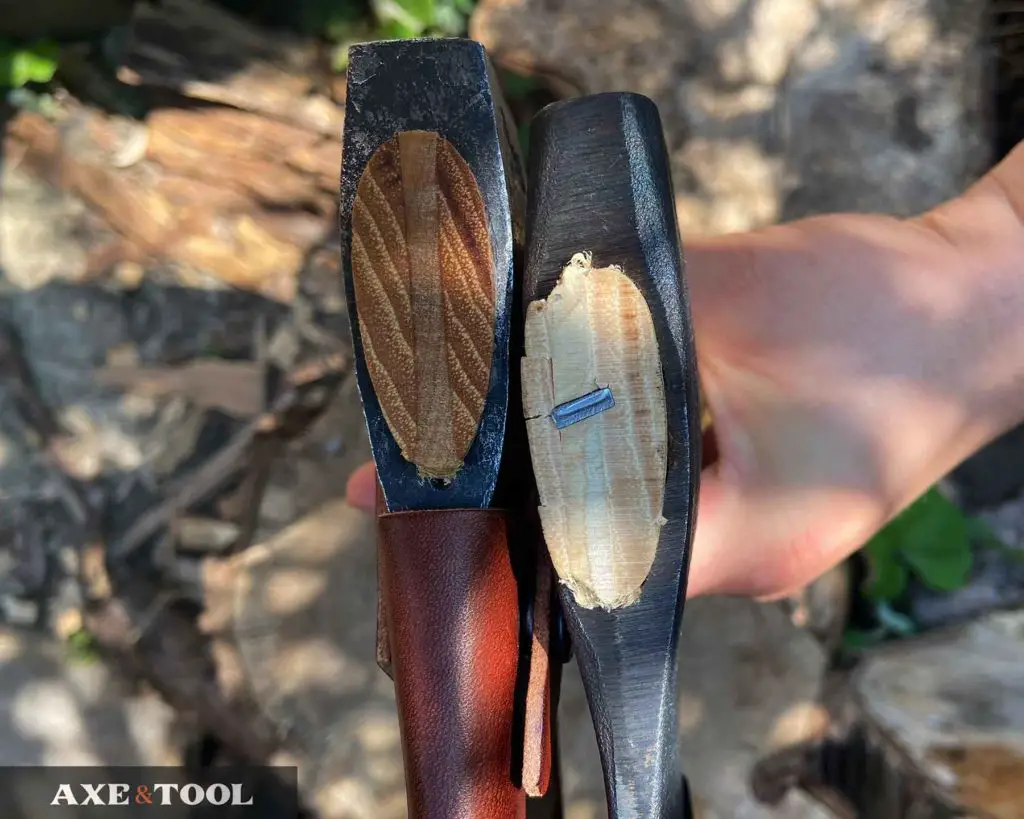
Gransfors Bruks on the left, a premium axe that doesn’t use metal wedges. The Council Tool axe on the right has a simple step wedge added. Cracks around the cross wedge are common and are not a concern.
Traditionalists will say a cross-wedge should not be added unless the handle starts to loosen but is more common than not these days.
Some manufacturers in the past have used epoxy in the eye to seal the head in place. These are an absolute pain in the ass to remove.
The Slip-fit method for axes
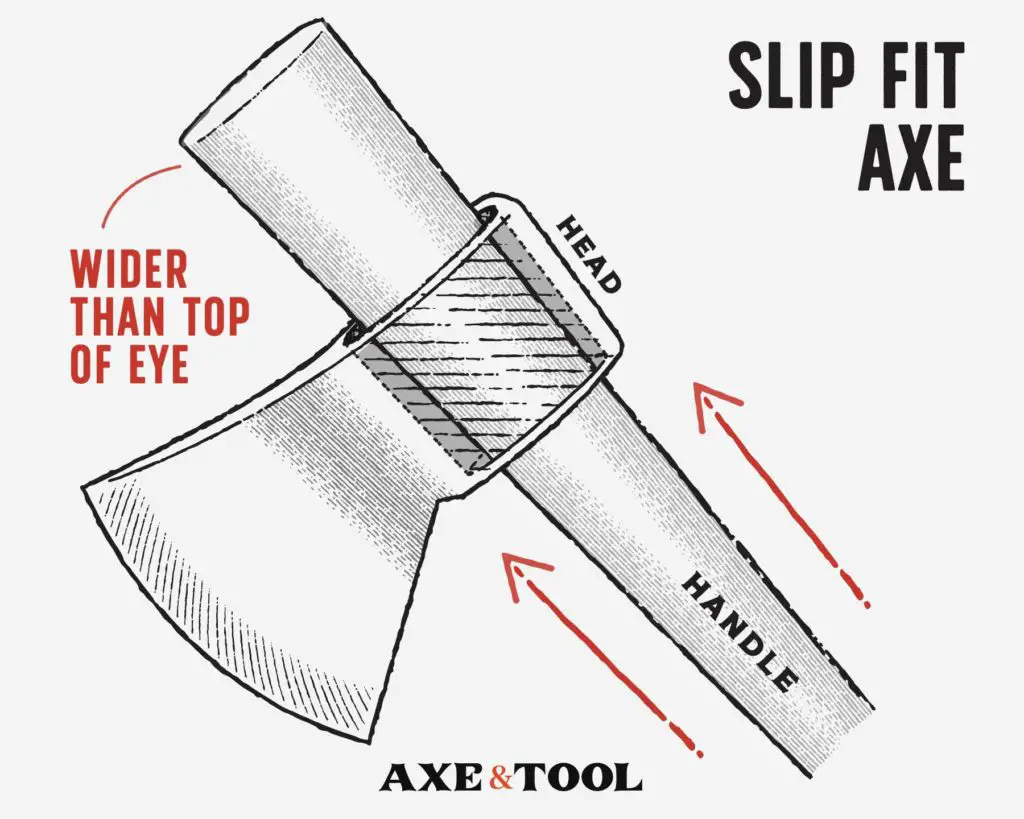
Slip fit is another traditional method for attaching an axe head to a handle, although it is much less common today.
A slip-fit axe is a type of axe where the head and the handle fit together without any wedges or mechanisms. The bottom of the handle slides through the top of the eye while the top of the handle widens to fit snuggly and secure the axe. This design allows for easy replacement and portability.
Slip-fit axes can even have multiple handles, based on the length needed. This design is more common in Europe but is also used for axes like tomahawks.
Wedged vs Slip-fit axes
The design of the eye for each type of axe head is different. So you can’t really use both methods interchangeably (although I suppose you could try).
An axe head will be designed to accept either a wedged hang or slip-fit handle. The handles (not the heads) are where you find the big differences.
Wedged Fit axes are more ergonomic and efficient
The curved and shaped handles are designed to be ergonomic, and balanced, and maximize efficiency for the axe user, making these axes preferred for heavy and extended work.
The grip end of the handle can have a large swell to help keep your hand locked in place and create a good stopping point if it slips. A lot of modern axes have pretty small palm swells because it takes time (money) to shape, but it makes a big difference to use.
Features of a wedge-fit axe:
- Handles can be curved
- Large palm swell
- Slender handles near the head
- Most axe heads are designed for a wedge
- Difficult to replace infield
- Semi-permanent
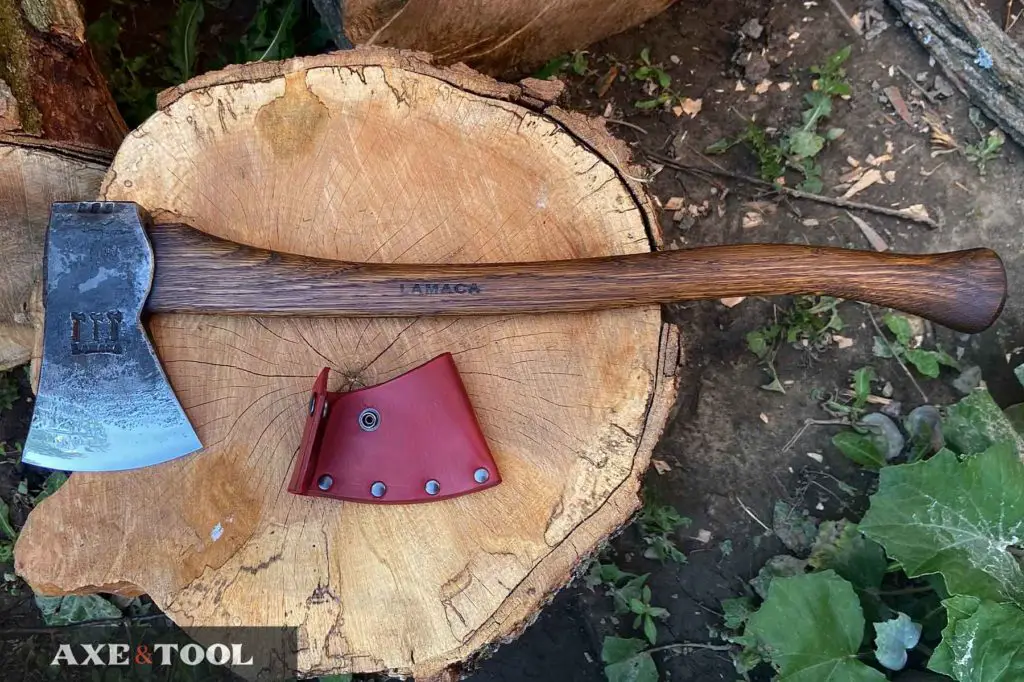
Slip-fit axes
Since the heads are not permanently attached, you could have multiple handles at different lengths for the same head. Then break it all down for easy packability. These axes generally are better suited for light or part-time work, and great for light use in the woods.
You can see there is a small palm swell that sticks out the front, but it’s limited because it has to fit through the eye of the axe. Tomahawks won’t have one at all, typically just a round tapered handle.
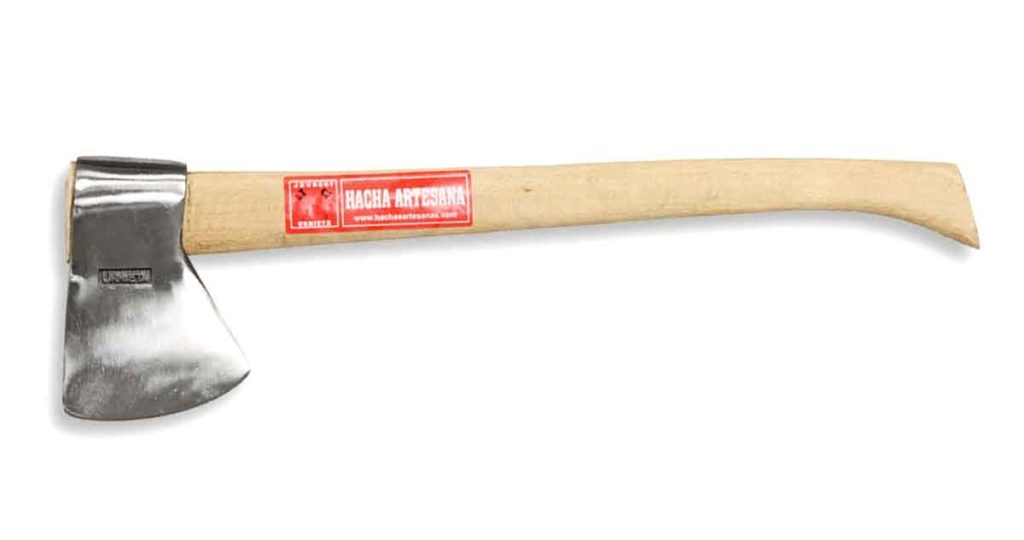
There aren’t many nice slip-fit axes anymore (I don’t own any). Basque (from Spain) is the only one that comes to mind, but there are vintage options, mostly in Europe. Anything you find in North America will likely be a mass-produced tomahawk.
Features of a slip-fit axe:
- Limited or no palm swell
- Straight tapering handles
- In field take down
- In-field handle replacement
Composite handles
There are a couple of types of composite handles for axes as well. These are only attached by manufacturers and not repairable by the end-users.
Epoxy
If the composite axe looks like a “standard” axe but with a plastic handle – it’s attached in a sort of similar way. It’s just stuck in the bottom and heavily epoxied. Pretty indestructible.
Overmold
The other method was popularized by Fiskars and is quite iconic. The handle is actually formed around a solid axe head, in a process called over-molding. Also proven pretty indestructible.
Please comment below If I missed something or if you have any questions. I do my best to respond to everyone.
About the author:

About the author:
Jim Bell | Site Creator
I’m just a guy who likes axes. I got tired of only finding crap websites, so I set out to build a better one myself.
I’m also on Instagram: @axeandtool
I’m restoring an old (1960s?) Norlund camp axe that’s been in our family probably about that long. It’s quite serviceable, I need to use it, and I have other projects that need my attention even though I’m not quite finished – And the bit keeps sliding up! No barrel wedges in town though they sell some axes with them and they want six and a half dollars for three step wedges – I only need one! So I went home.
After lunch, I’m going to scrounge around the bottom of the toolboxes until I find an old brass washer, fold it in half, give’r a sharp whack or two to make the touching edges sharp, and drive it in gently. I’ll soak it in Ballistol overnight and see how she does in the morning before the sun steals my shade. https://i.imgur.com/0NiToUy.png
Great looking axe. Yeah I’m always amazed what they charge for step wedges. The only way you can get them for a decent price is in bulk, which most people don’t need. The Ballistol soak might help a little, but I don’t think it will be enough – you are going to need to find something to hammer in there. Good luck
There is a product to help keep heads fitted to wooden handles to stay on.
It is called “Swel-Lock”. It ain’t cheap, I paid $16 for 2 oz on amazon, it’s $17 now.
Or just bang the end of the axe w/ a mallet to ‘suck up’ the head.
When it’s tight soak the head w/ linseed oil or similar.
I used an old beer (found by road), cut out the ends & the side to open it, fold it into a tray about 1/2″-1″ deep, stand the axe in the tray & pour some oil in.
Leave it soak as long as you can or you want.
That should tighten it up.
Hopefully helpful.
Have a GREAT day, Neighbor!
Appreciate the tips! I will have to look into Swel-lock (never heard of it before). But that beer can trick is such a good idea – I am going to try out immediately with some BLO.
I want to use old coins for wedges or possibly cut some from rail road spikes
You could certainly use old coins for the cross wedges after the wood wedge is in. Railroad spikes might be a little hard – but let me know how it goes.
Jim B.,
Good job sir with the information that you have shared in your website.
For a new and different approach to the halfting process check out my website on how I approach this topic of hanging an axe head on a handle.
Thanks for checking out the site Pete! I’m just in the process of a more detailed hanging article myself – I will check out yours once I have finished mine.