How to Carve with an Axe: Techniques, Process & Tips
Wooden canoe paddles, snowshoe frames, spoons, tool handles, bows… These classic items are still being shaped today by artisans all over the world under the keen edge of the carving axe.
Carving with an axe is a versatile craft that is relatively easy to learn and doesn’t require a lot of expensive equipment, making it easy for beginners to get started.
Why Carve with an Axe?
An axe is both a simple and efficient tool, capable of bulk-removing wood with far less effort and energy than if done with a knife. Axe carving also doesn’t require the wood to be held in a vise or other clamping device, and can be done at a work bench or in remote settings.
Axes can be used to rough shape an item before being finished with a knife or other fine-shaping tools. Or, it can be used to complete the entire project, as in the case of hewing logs into timbers for framing.
Choosing an Axe for Carving
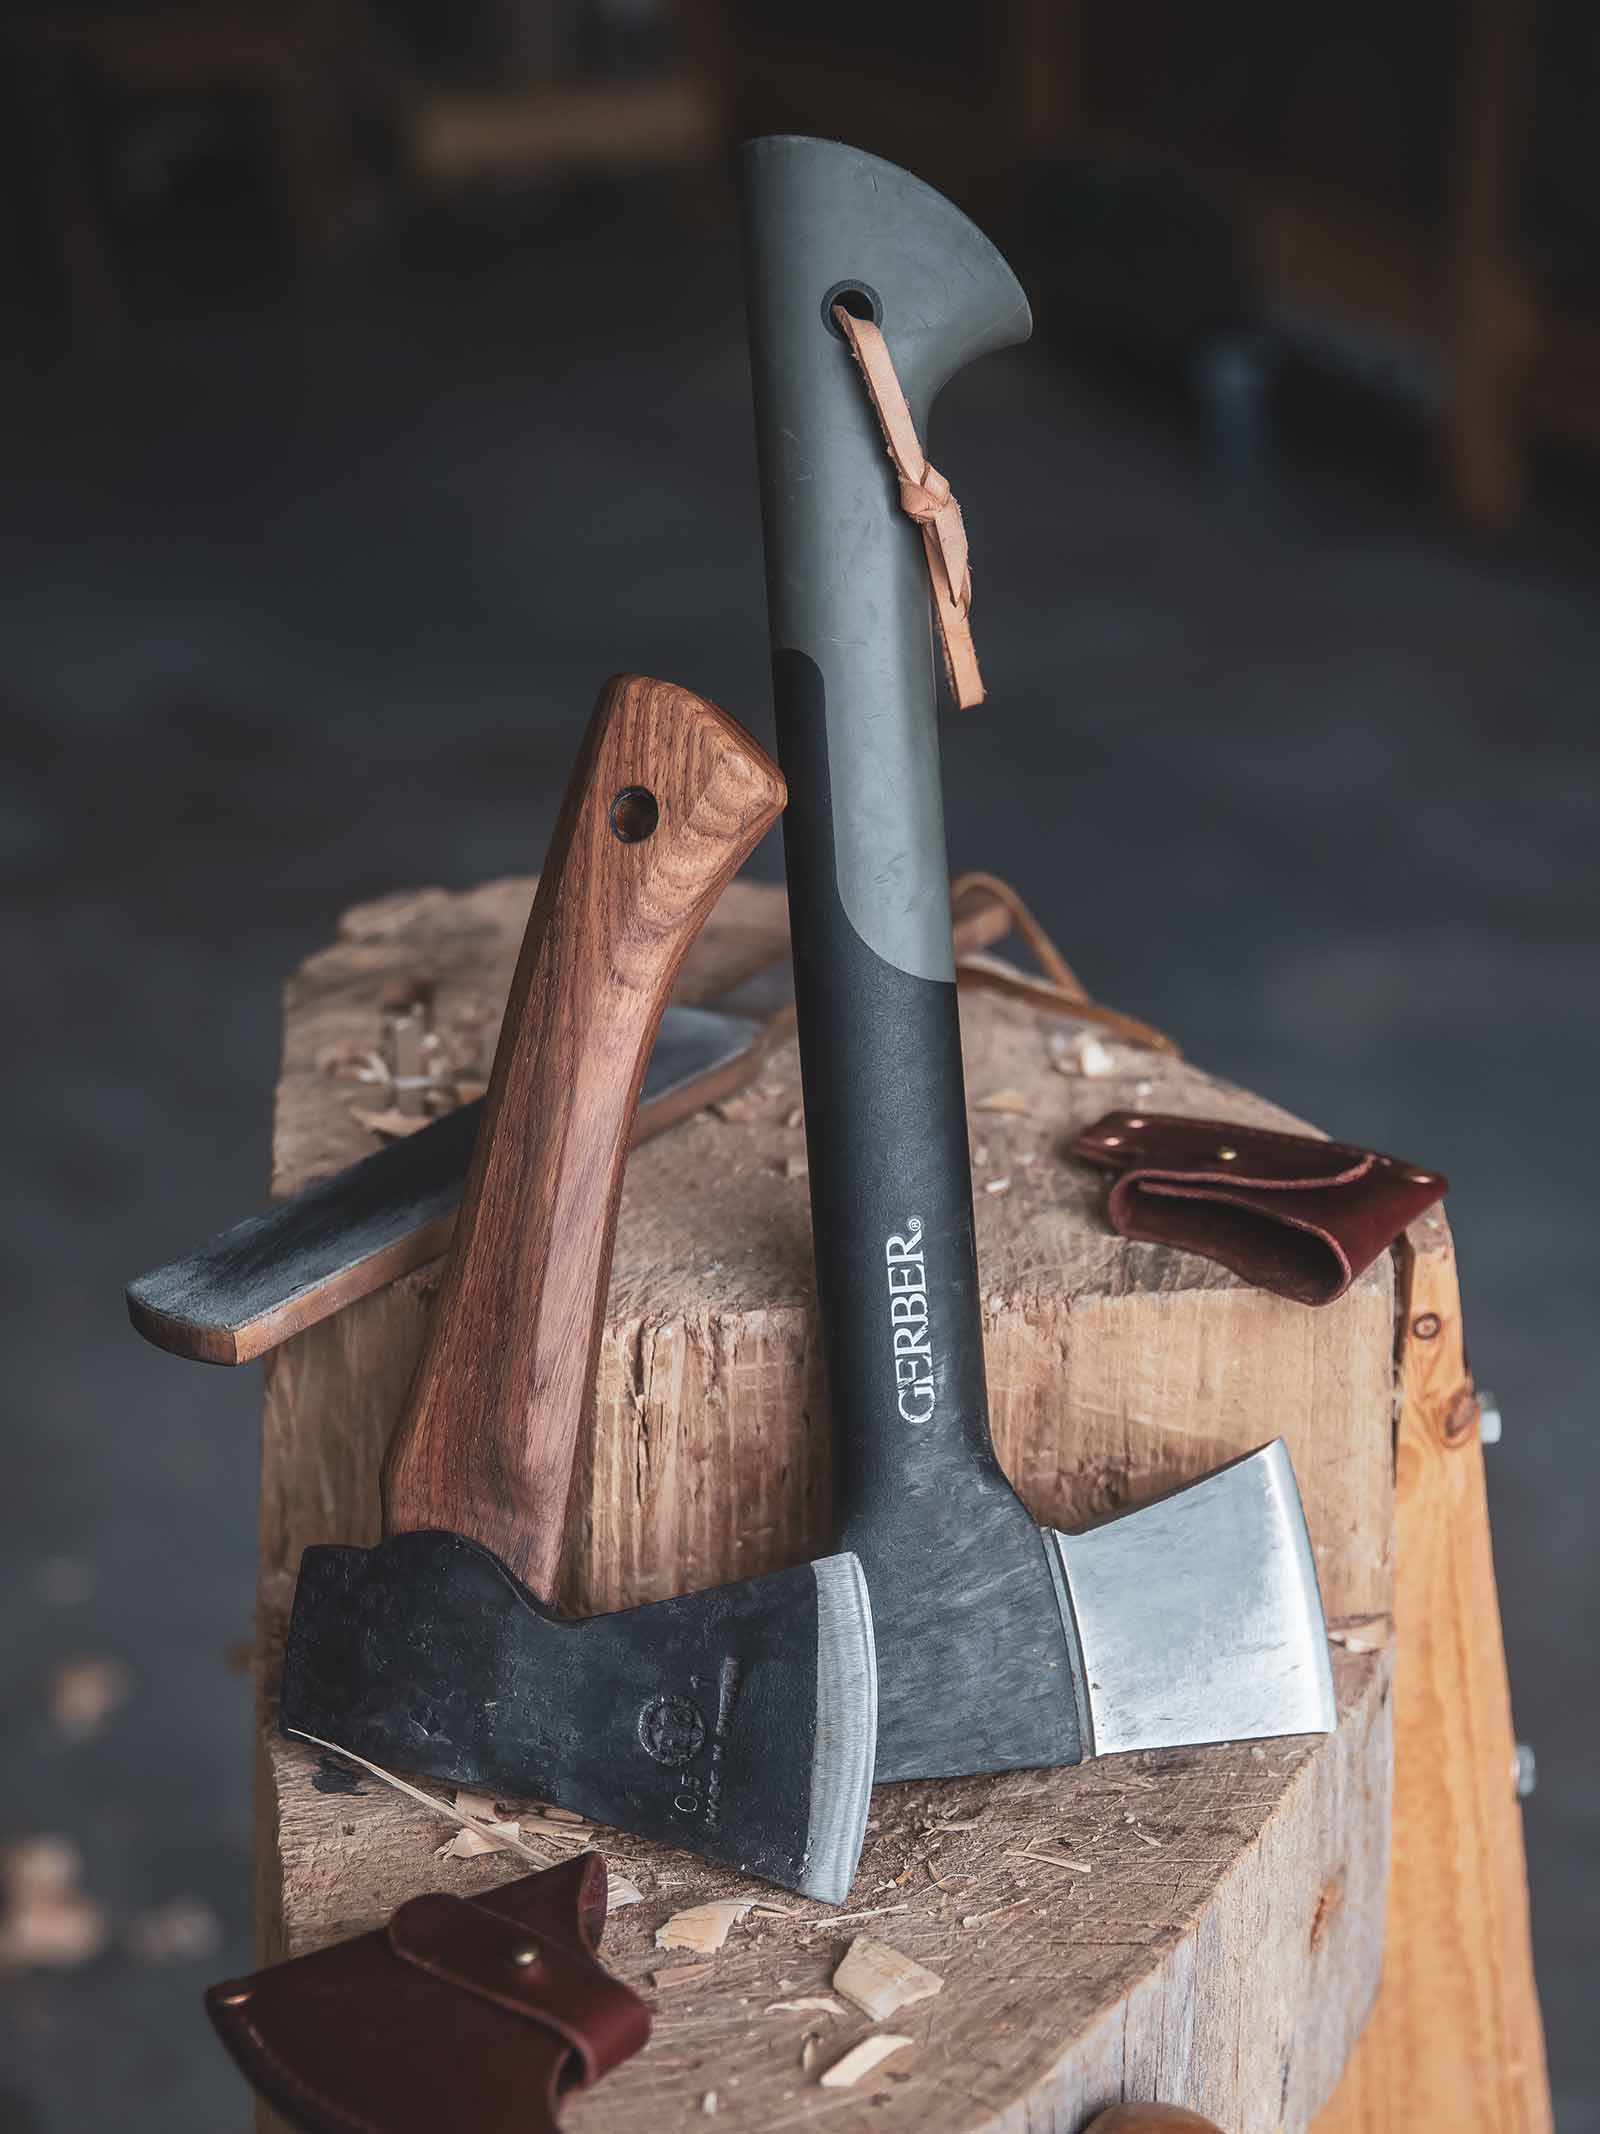
Luckily, you don’t need a special axe to learn how to carve with an axe. Many common hatchets can be used or modified for learning the basics, but there are also specialty axes designed for carving (called carving axes), which are obviously suited to the task.
Whatever axe you have, it is critical it must be sharp. Be sure to maintain a keen edge. Make or buy a flat axe strop to keep the edge tuned. The edge should at least bite into your thumbnail. Shaving hair, slicing paper, or leaving a glassy finish on the end grain are good indicators as well. A dull carving axe is like a fast car with bald tires.
“Standard” Hatchets for Carving
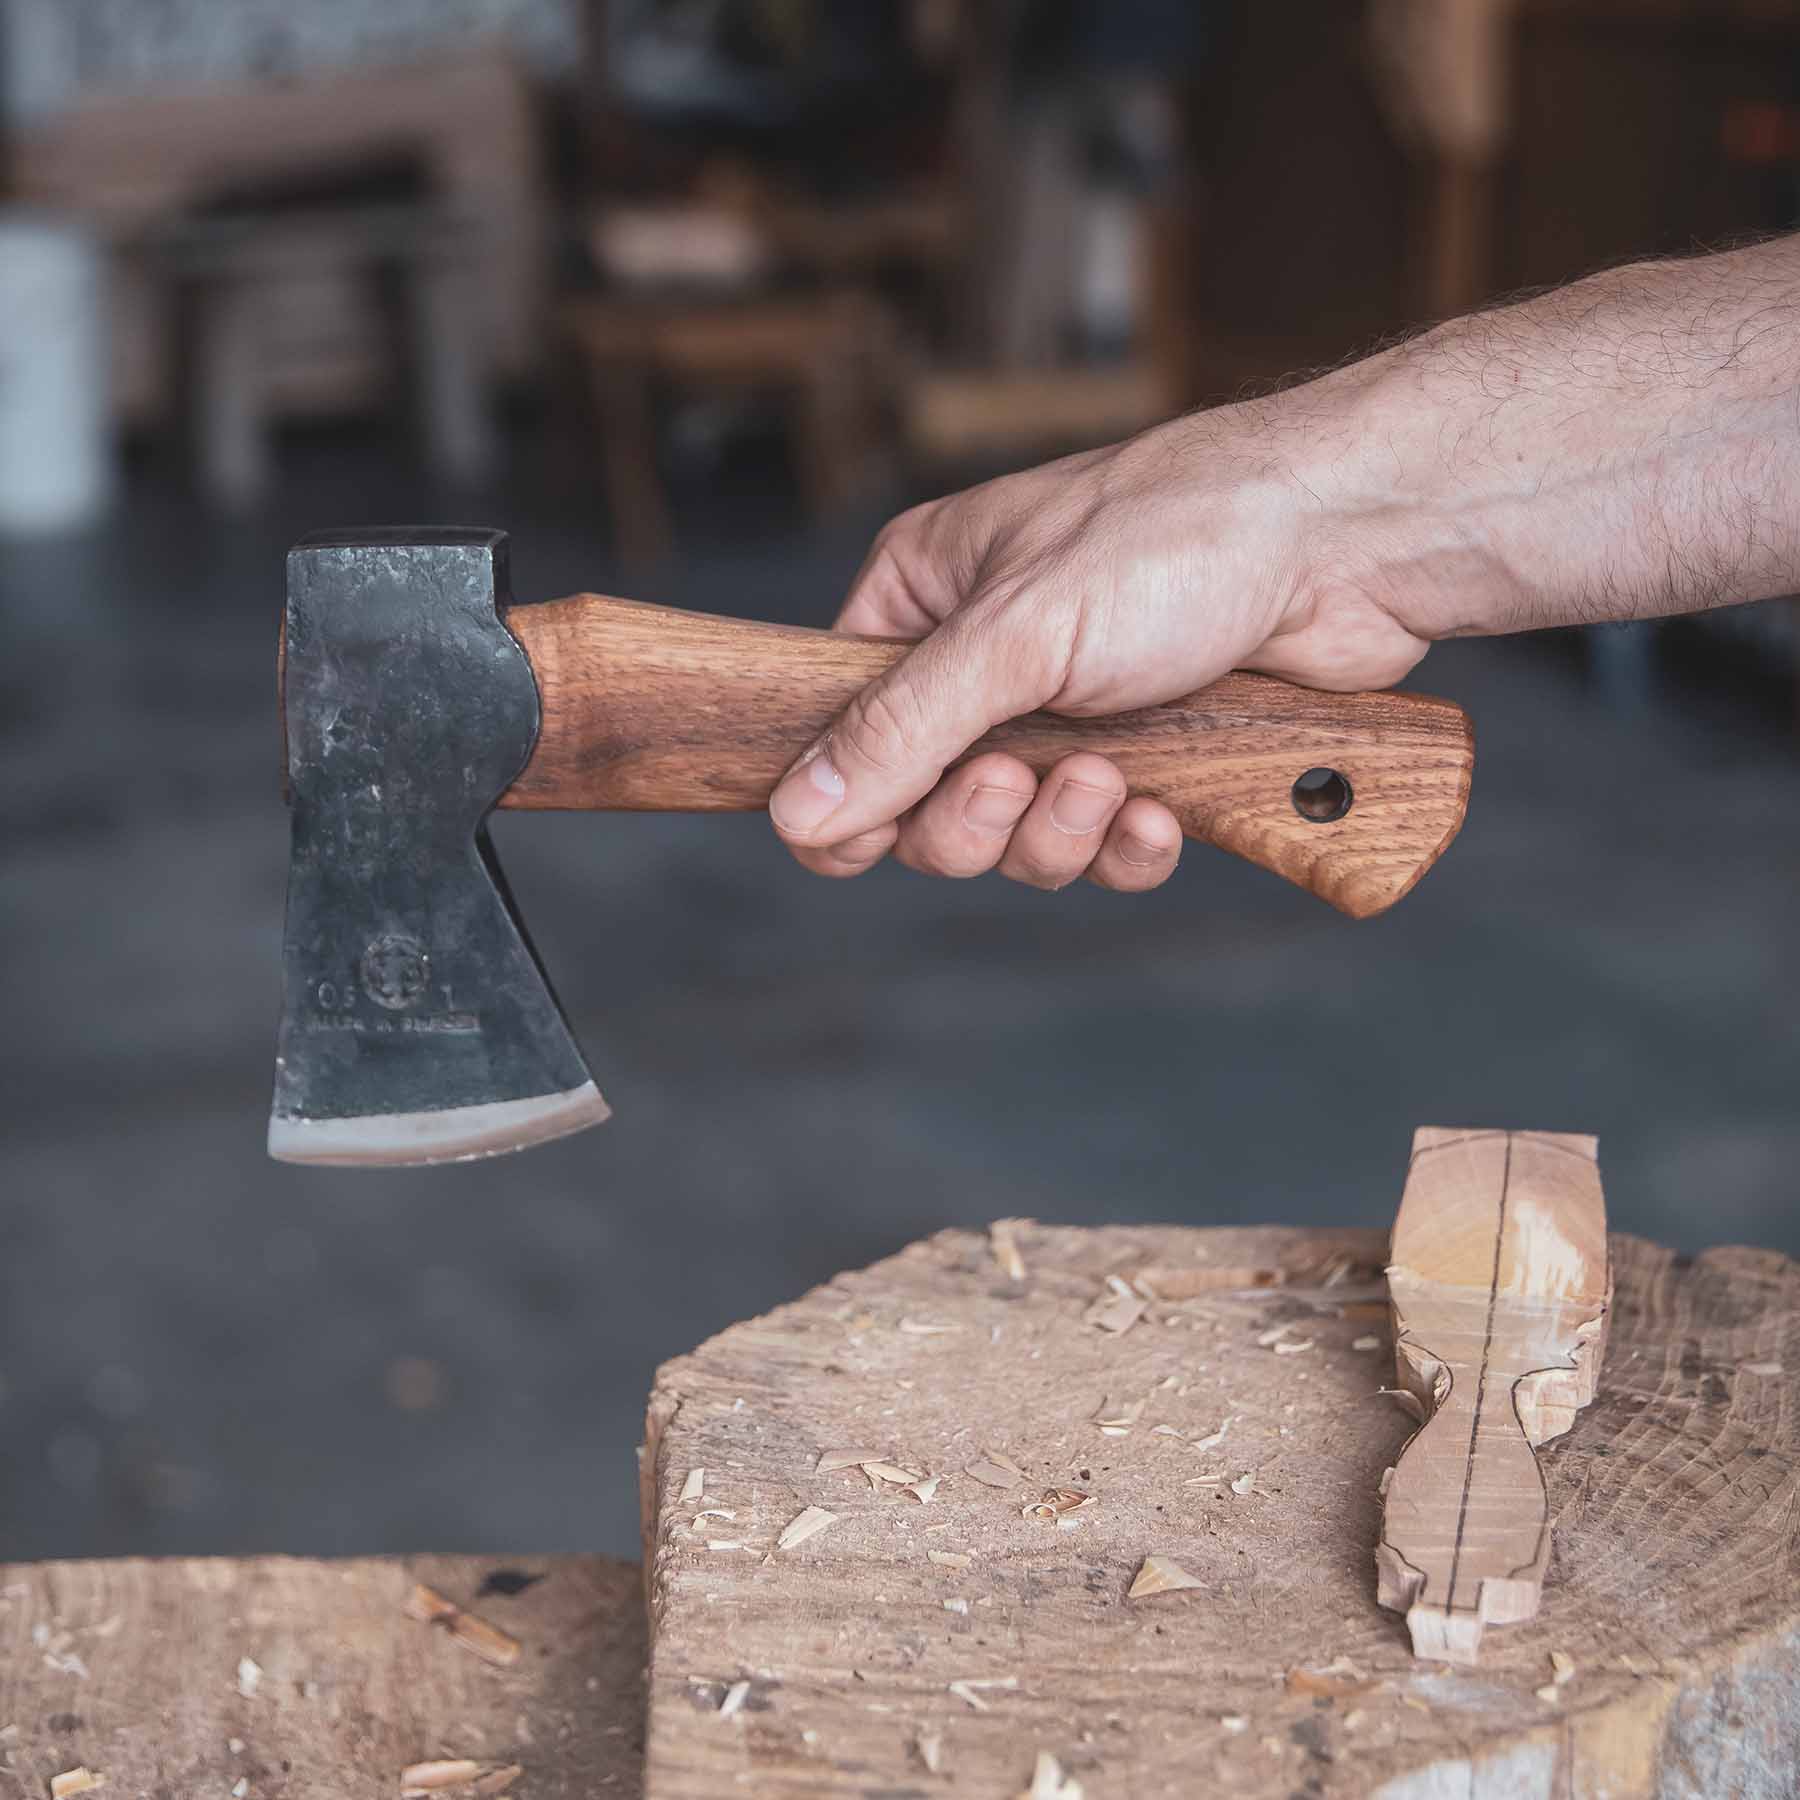
It’s actually best to start learning with a smaller “standard” hatchet. The nuanced features of a carving axe will only be useful once you have learned the techniques and skills of carving.
I prefer a 1-pound head as I don’t get as fatigued, which affords a margin of safety and efficiency. This could be a fairly inexpensive new hatchet or an old one you have lying around.
To modify a hatchet to be better for carving, make small adjustments like giving the edge a flat bevel. It’s a keener edge that can be used for more precise cuts along the workpiece and allows you to “ride the bevel” as you would with a chisel.
Old hatchets can make great first carving axes, as they are often made from better steel than modern axes, and can be found cheaply. And surprisingly, Fiskars (Gerber) hatchets make brilliant little carvers. They’re cheap, have good flat edge geometry, are lightweight, and pretty comfortable to grip anywhere along the handle. I use a Gerber hatchet myself, as do many other carvers I know.
Specialized Carving Axes

Carving axes have unique heads and handles that are designed for use with carving techniques and to give the user maximum control. They have heads with pronounced beards, fairly long and radiused bits with upswept toes, and usually weigh between 1-2 lbs.
These specialty carving axes can be expensive, as they’re made by high-end axe makers and craftspeople. But luckily, you don’t need to invest in a high-end axe to learn to carve with an axe. It’s more important to learn the techniques.
If you are curious, see why premium axes cost so much.
Proper Axe Carving Grip
Don’t grip the axe too tightly. Also, avoid laying your thumb on the back of the haft, as this can lead to increased tension and injury over time.
Hold close to the head for fine precise cuts, and hold further down the handle to get more power during bulk wood removal.
The Proper Form for Axe Carving
When you carve with the axe in your right hand, keep your right leg extended back. If the axe misses the block, you want it to clear past you, not land in your thigh. Reverse for left-handed carving.
Your swing should generally come from your elbow and shoulder, not your wrist. Think of dropping the axe in a controlled, slicing manner (more on that in a moment).
Don’t let your fingers or thumb on your non-axe hand wrap around or extend over the edges of the workpiece. Remember, axes are wickedly efficient.
Axe Carving Techniques
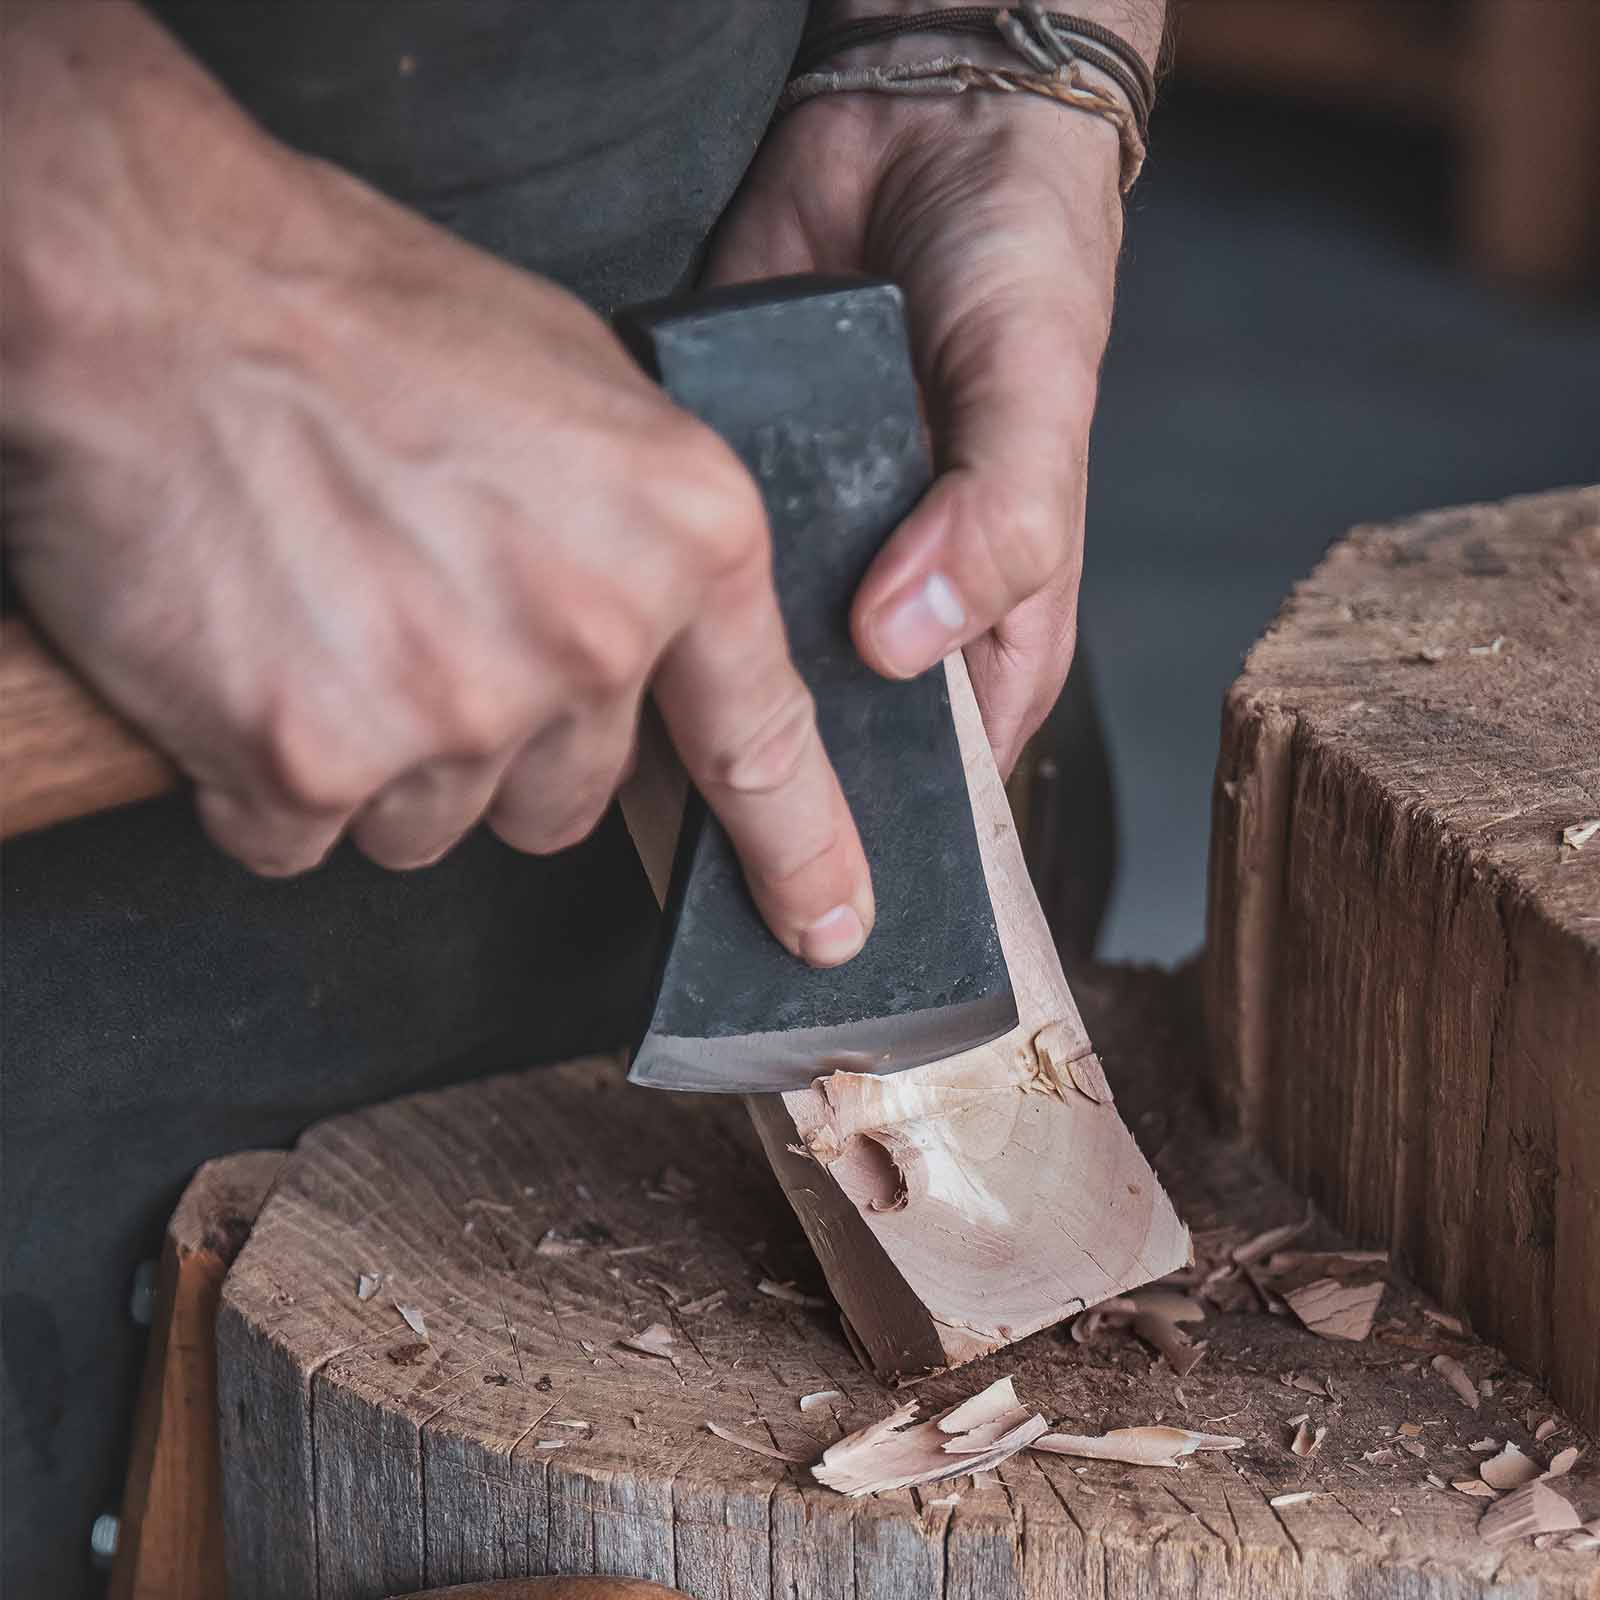
As with a knife, the axe cuts better with a slicing or slashing motion than with a brute smashing motion.
If you press your finger INTO a blade, you can apply considerable force before it cuts you. However, it takes minimal pressure to cut you if you slide your finger ALONG the knife’s edge.
The same principle is at work when a chef is slicing produce on a cutting board. As such, I often lead with the heel (bottom edge) of my axe and let the curve of the bit slice through the cut after contact as it carries forward.
Specific Axe Carving Cuts
Paired with this basic slicing motion of cutting, there are many specific techniques that are used for things like bulk wood removal, flattening and plane, and detail work. Take your time and try them out as you learn.

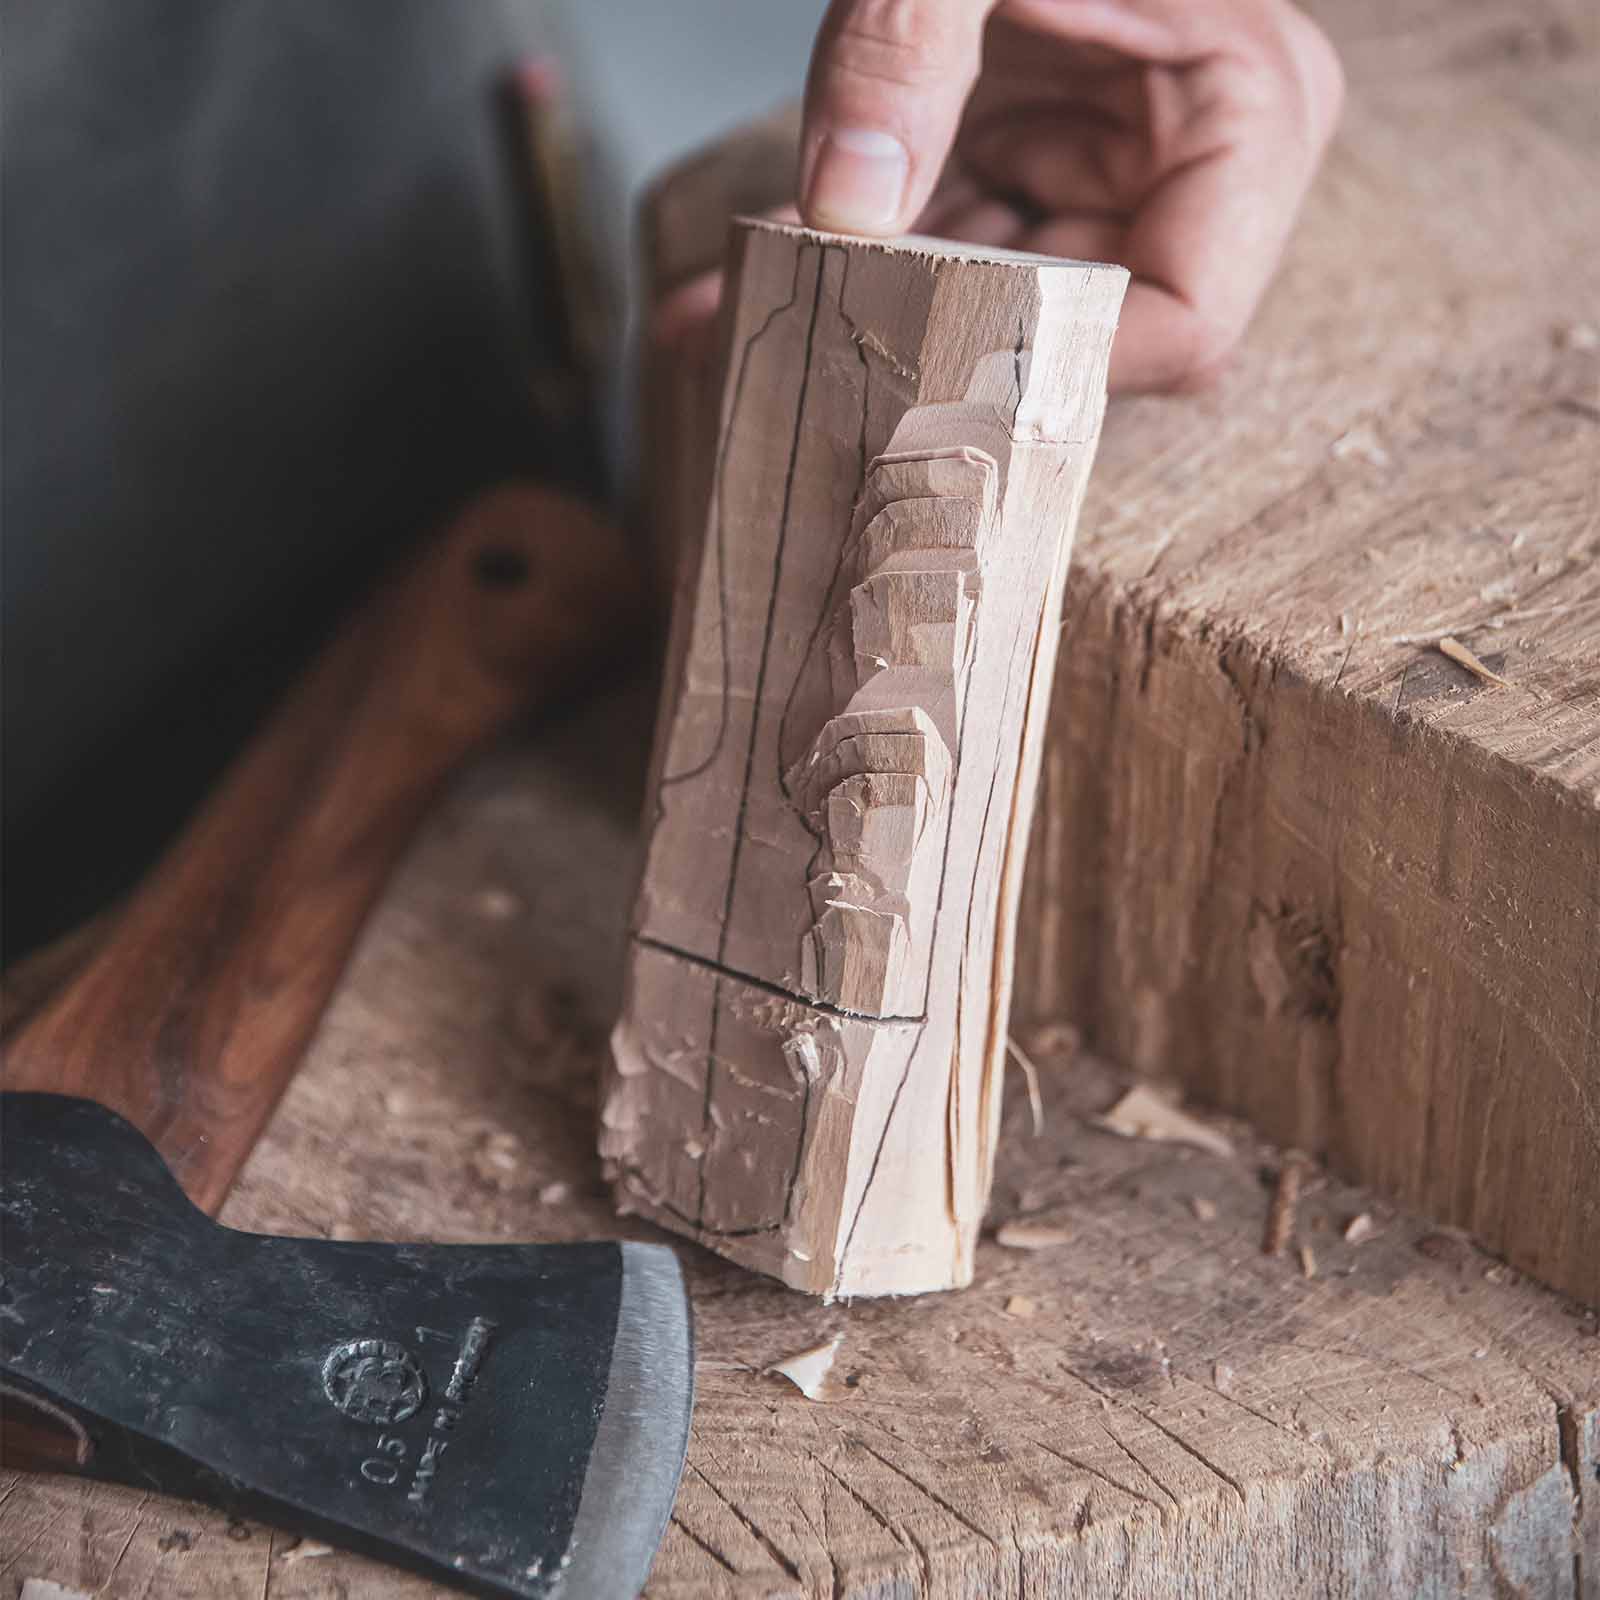
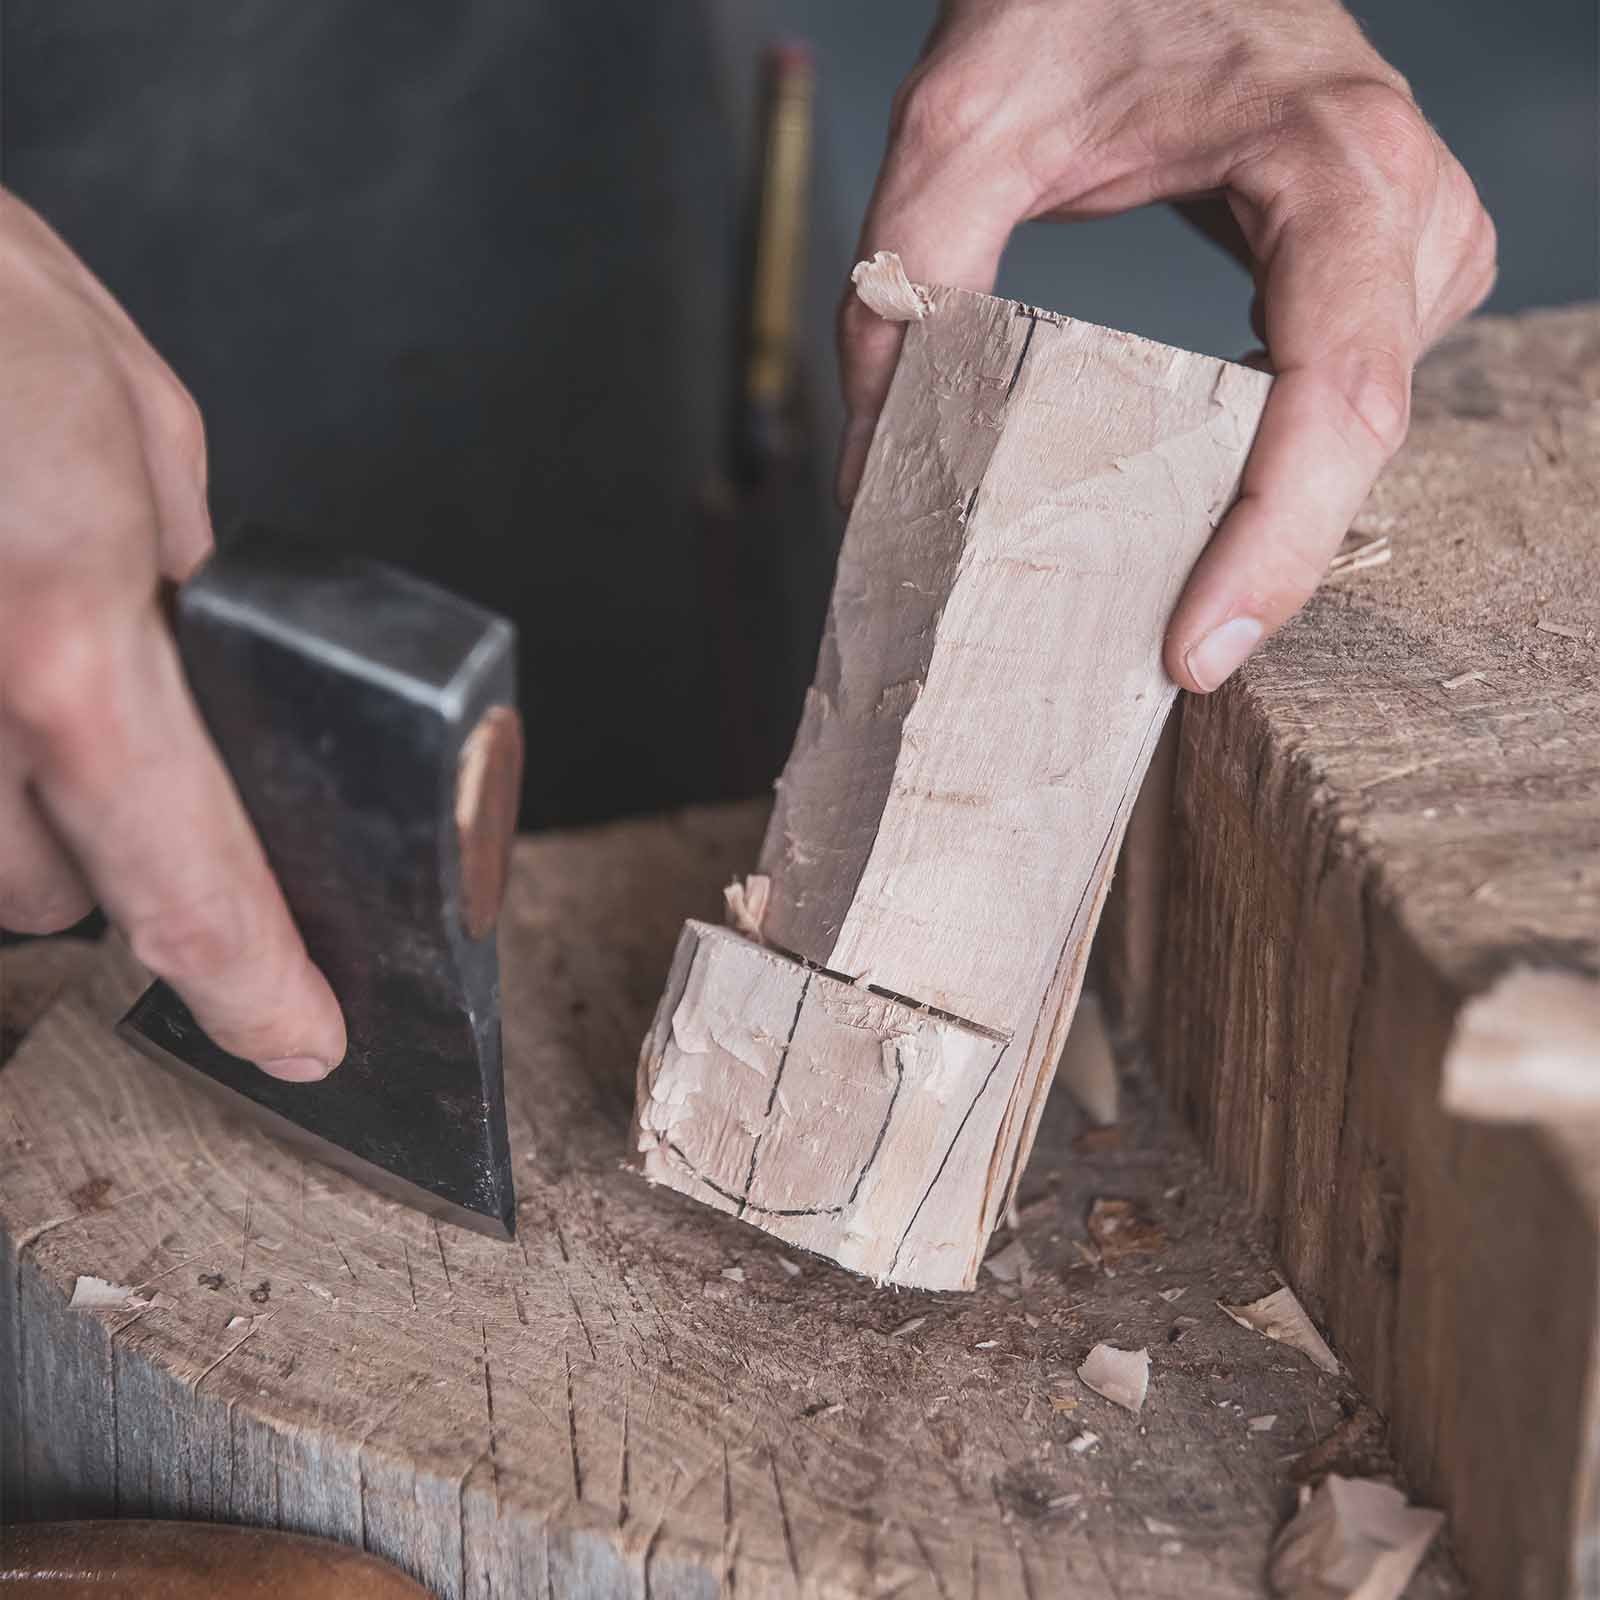
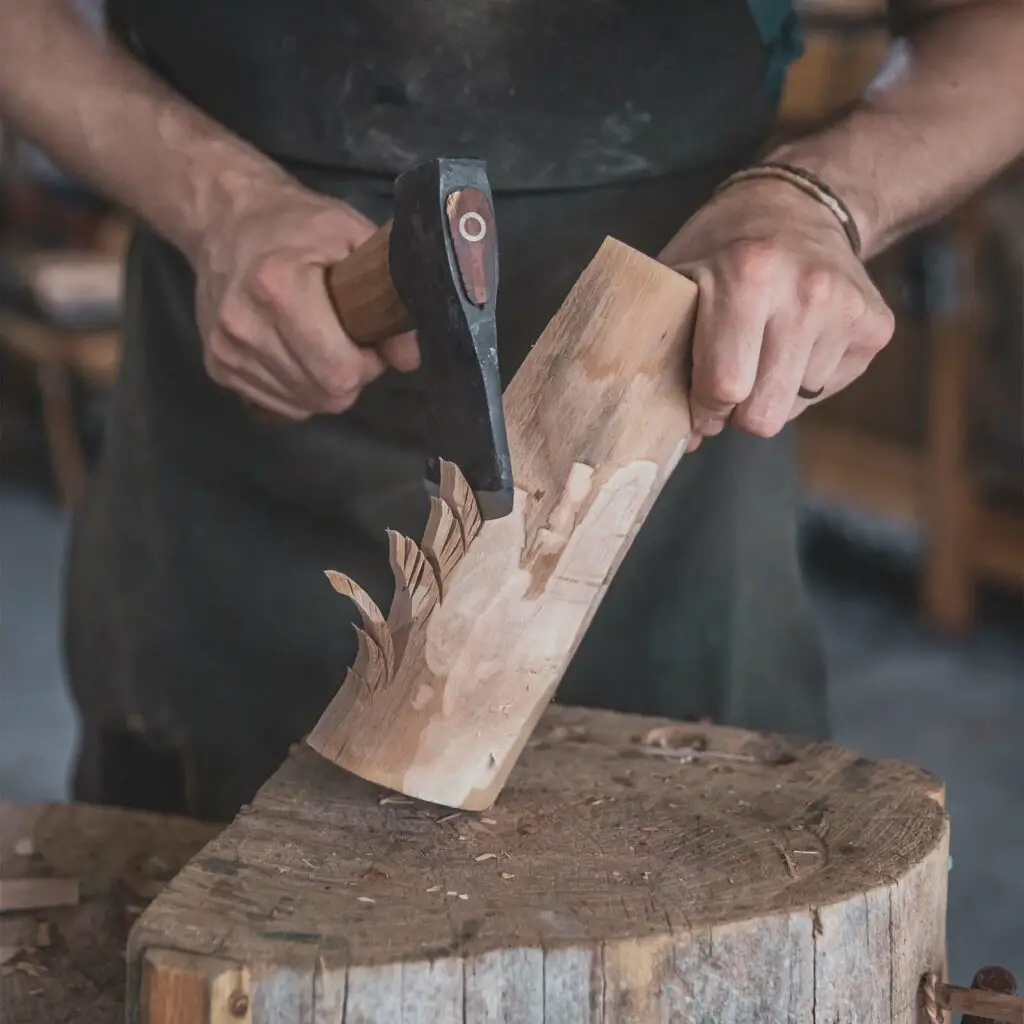
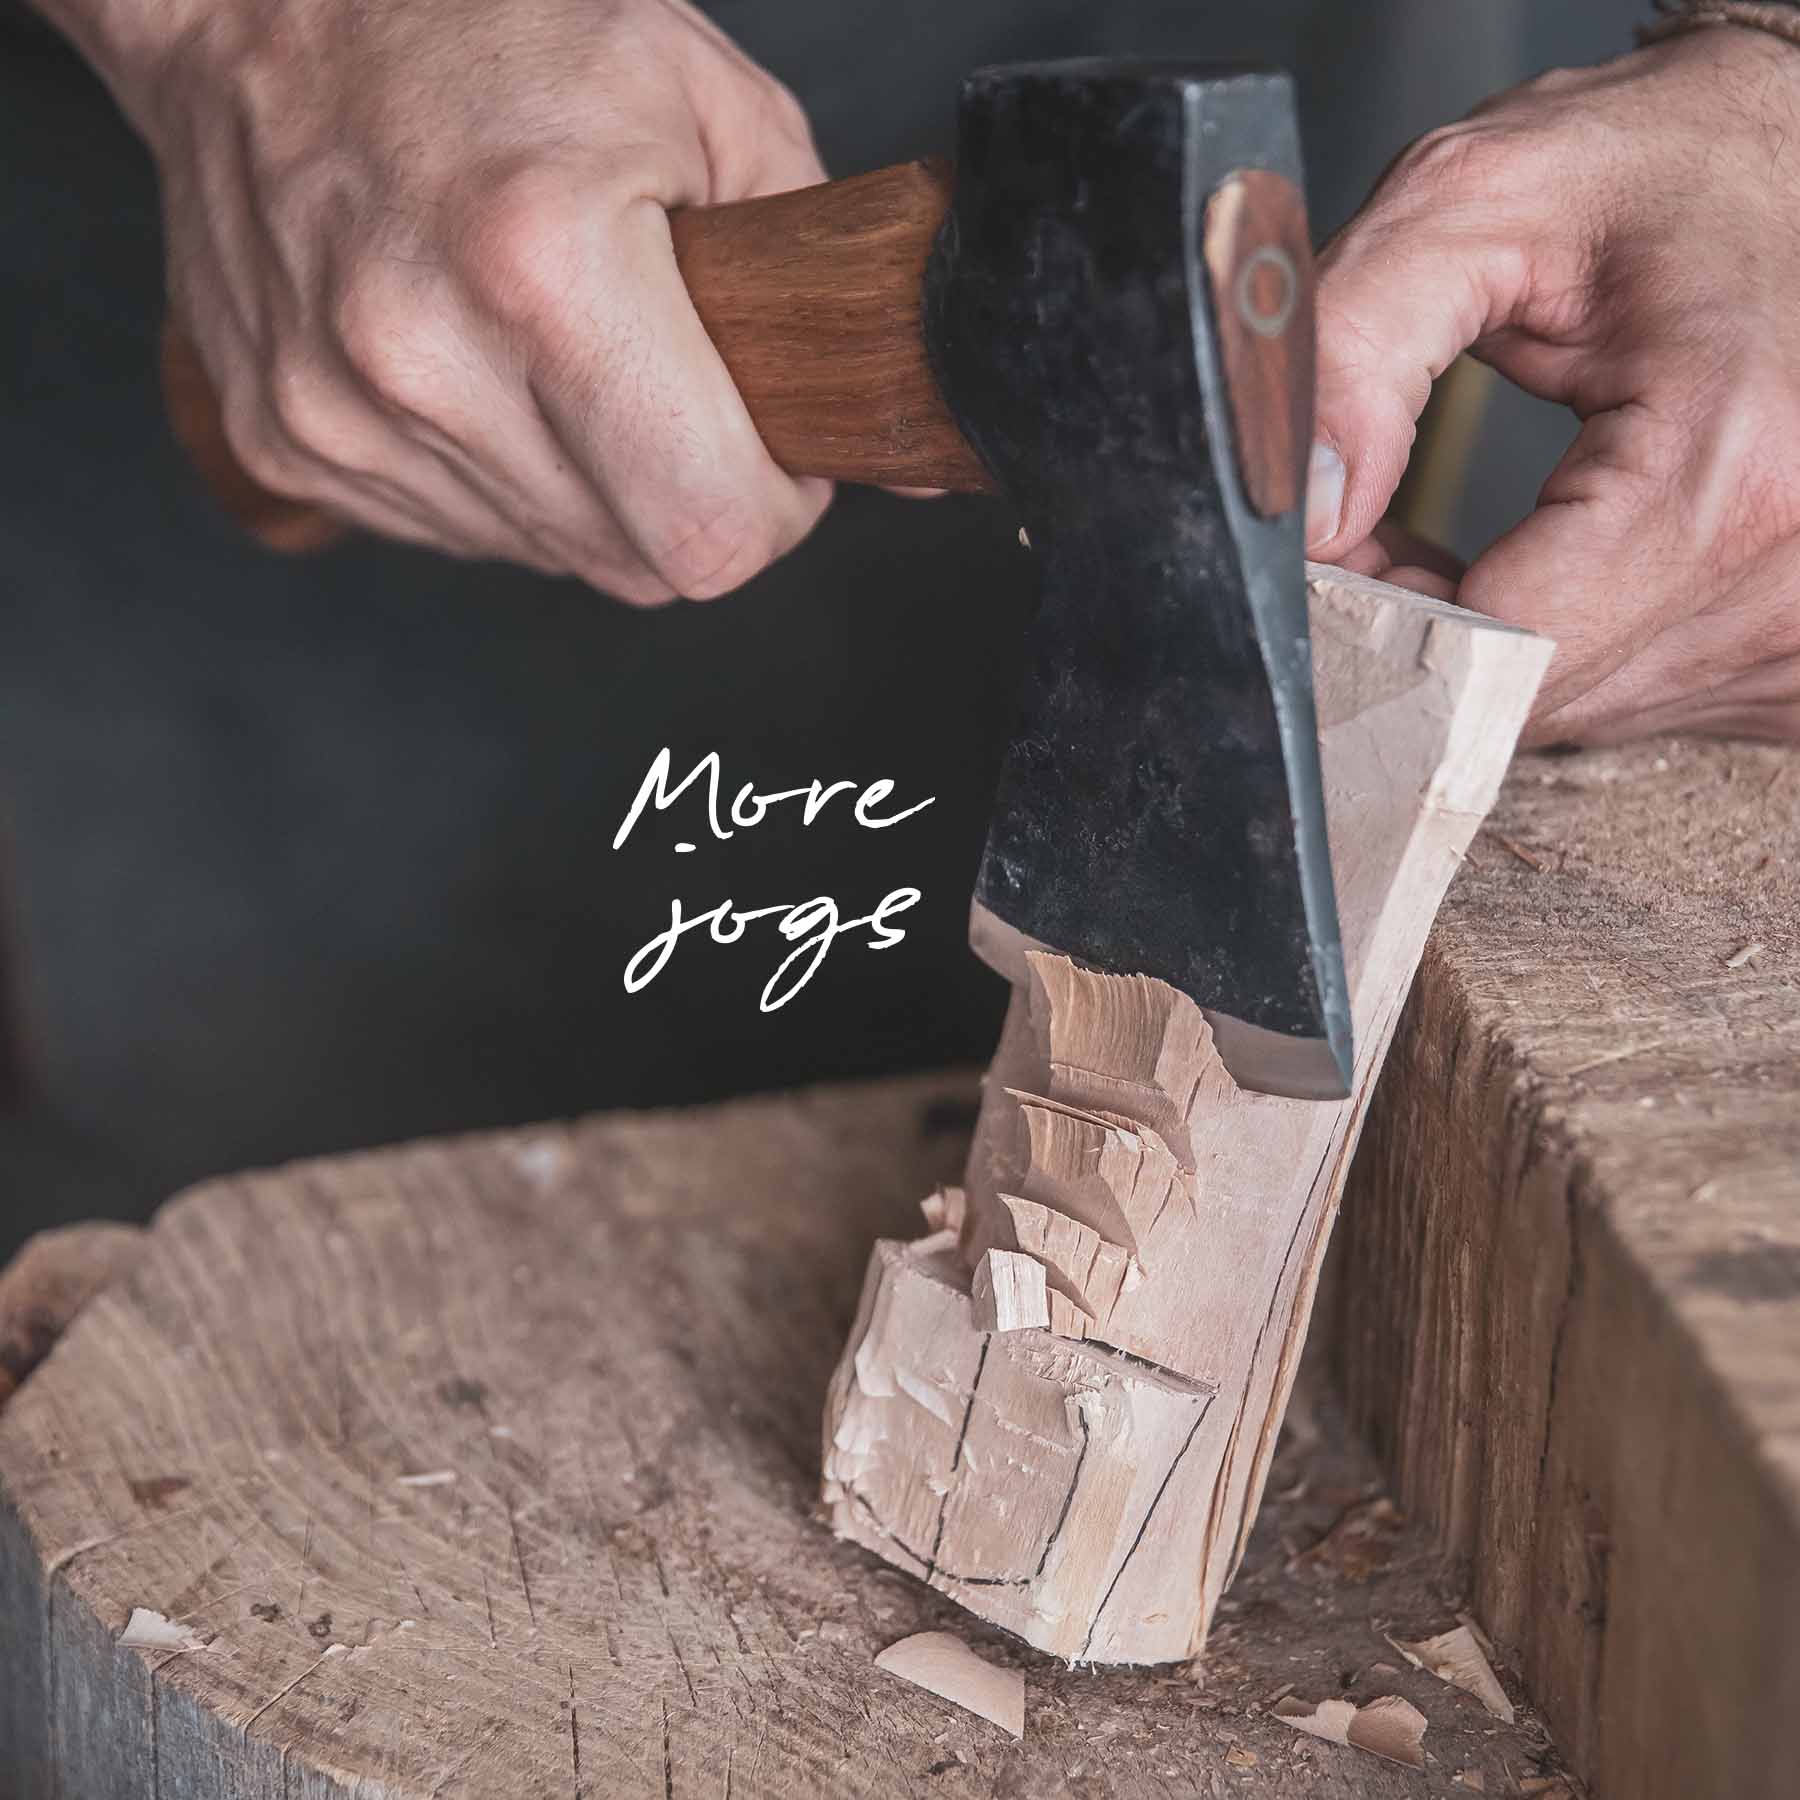
Go For a Jog:
Jog cuts are the easiest way to remove large amounts of material, quickly.
Stack “jogs” or cross-grain scoring cuts along a section to be removed. This breaks the grain, leaving the sections unsupported and easier to remove. (This is what gives hand-hewn logs their distinctive look.)

Cut Corners:
That is, carve away the edges, and make them first if none are present. A good example is when trying to reduce the thickness of a billet with a square or rectangular cross-section.
First jog on an angle along the outside two edges of the plane, then remove the jogged wood to create a triangular-shaped face with a ridge running down the middle. Then repeat the process by jogging along that new ridge to flatten the plane.
Bump Cut:
If the axe sticks, you can raise the axe and workpiece as one unit a few inches off the block, then drop them together. This often clears the axe and splits out the chip in one motion. Be sure to keep all ten fingers ABOVE the bit of the axe.
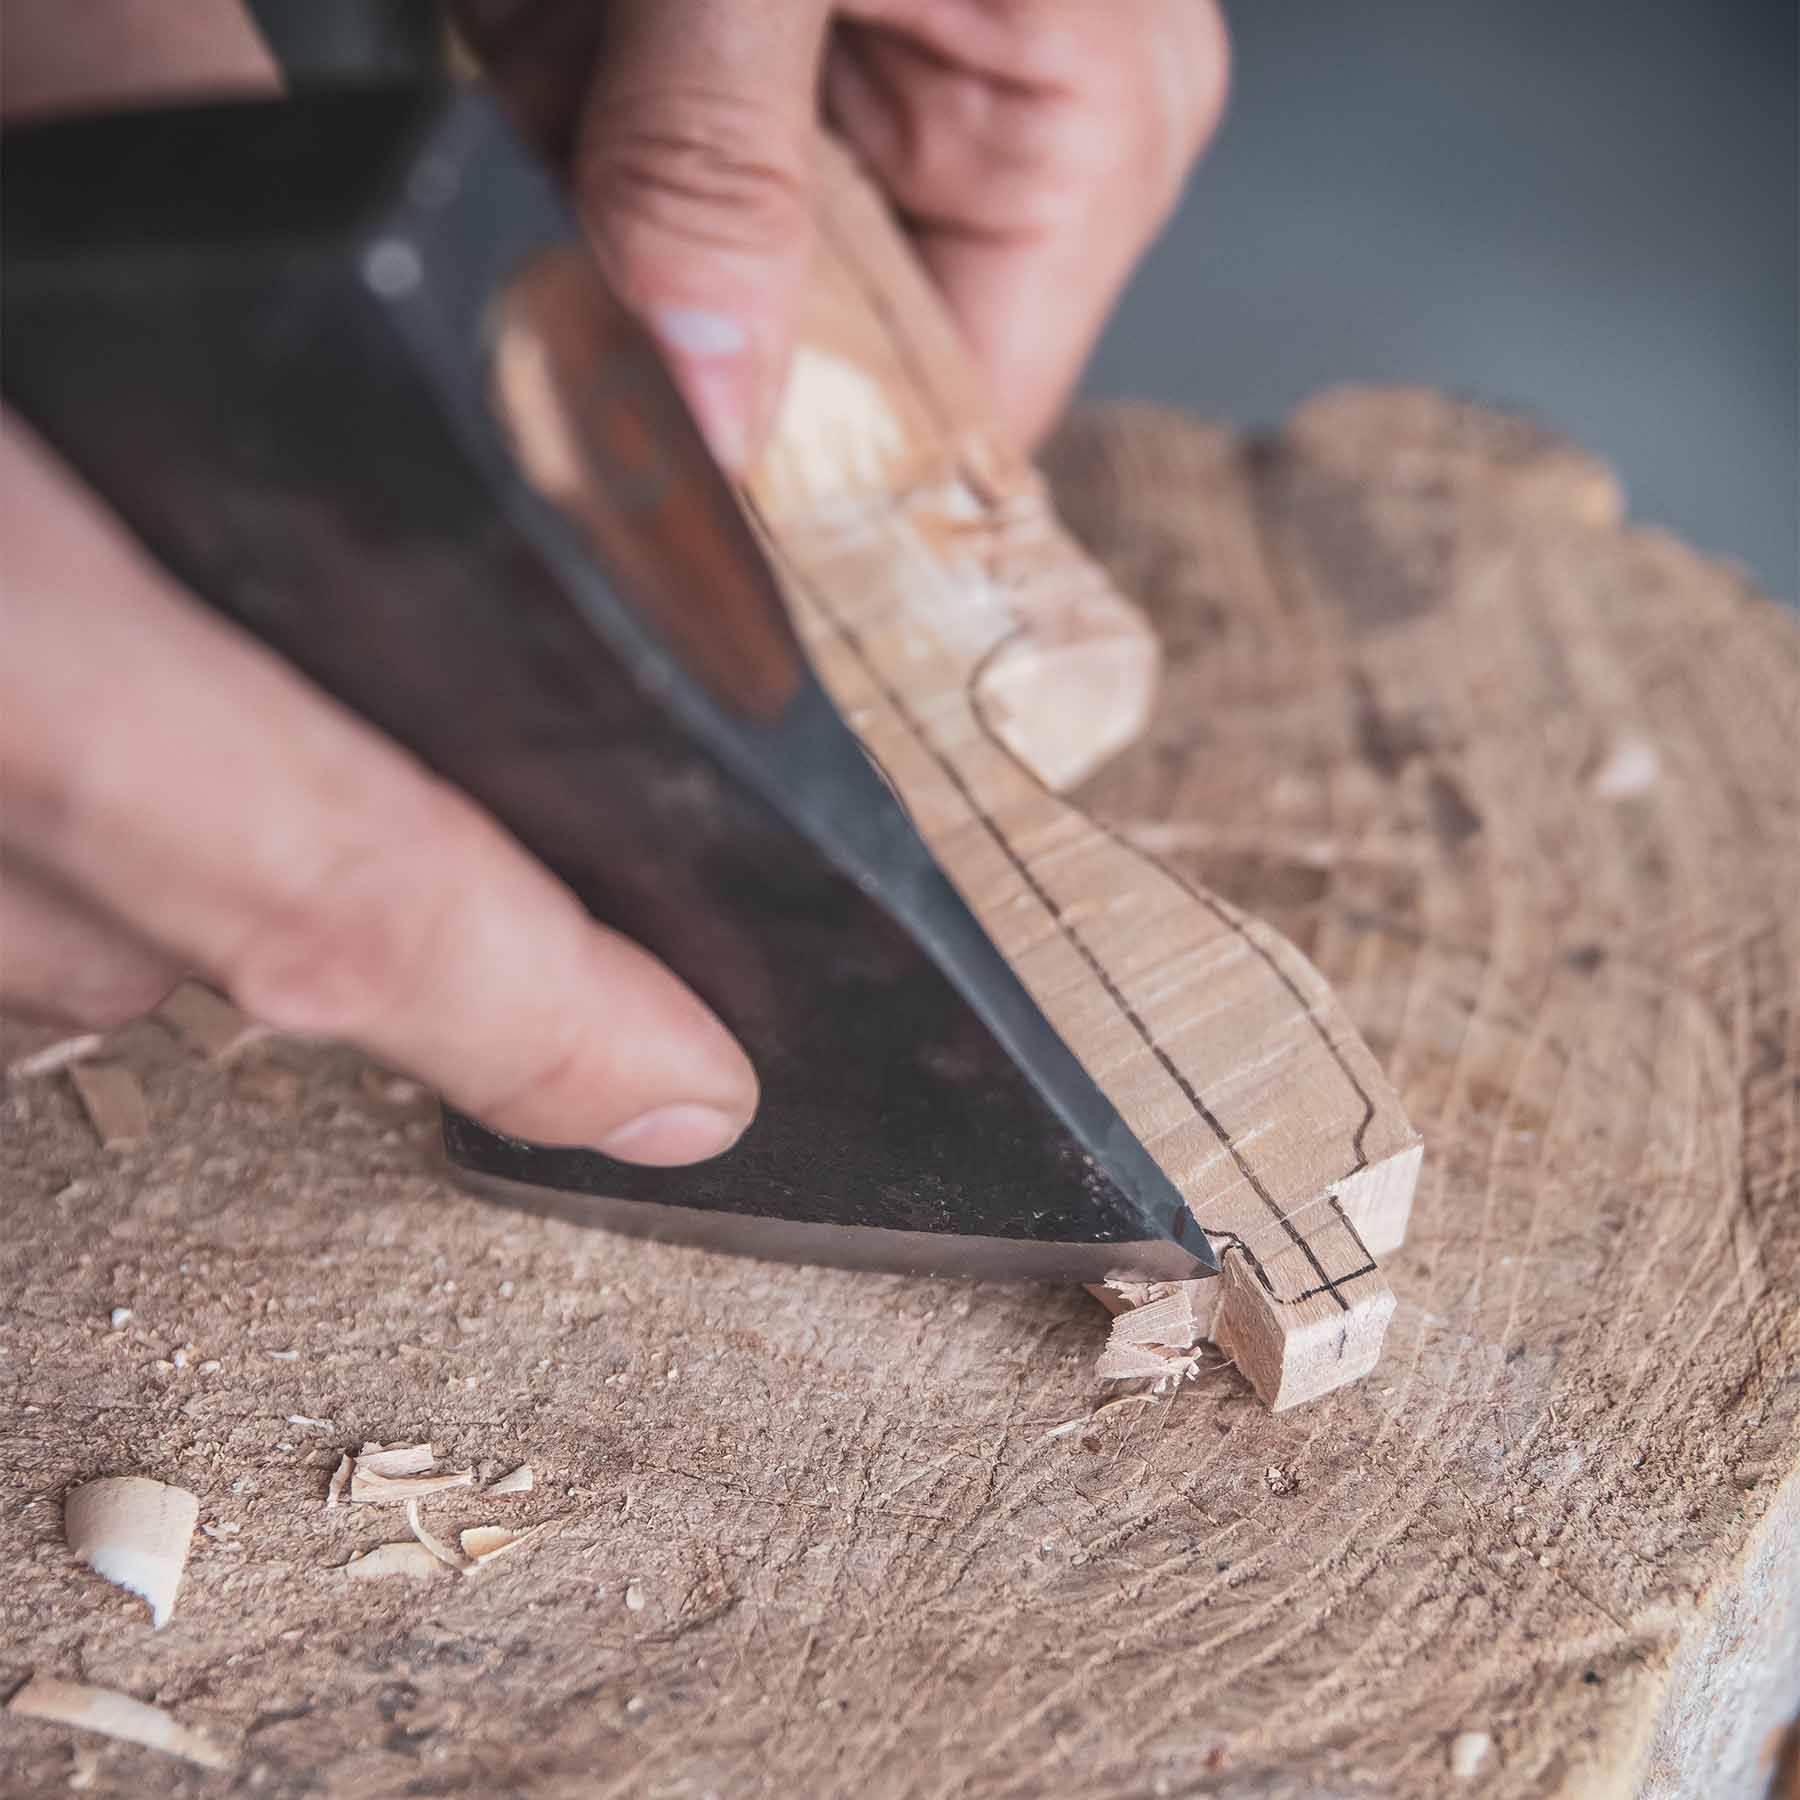
Stop Cuts:
Use a saw to make one or more stop cuts to allow accurate bulk removal (especially when paired with the bump cut ) and to prevent splitting out delicate sections such as the concave radiuses of a spoon. This works much like jogging.
Guillotine Cut:
You can round off corners in a safe, controlled manner by resting the toe or the heel of the axe on the block, then rocking the axe through the wood to slice off the corner like a paper cutter.
Be careful that the axe doesn’t skid along the block and into your hand. Again, this is similar to a chef dicing produce by keeping the tip of the knife in contact with the block.
Planing Cut:
To refine a flat surface, you can use the axe like a plane. Ride the bevel along the surface of the wood and provide support with the index finger of your axe hand laid along the outside cheek of the axe.
Sometimes you can push on the poll with your non-axe hand for more power and control.

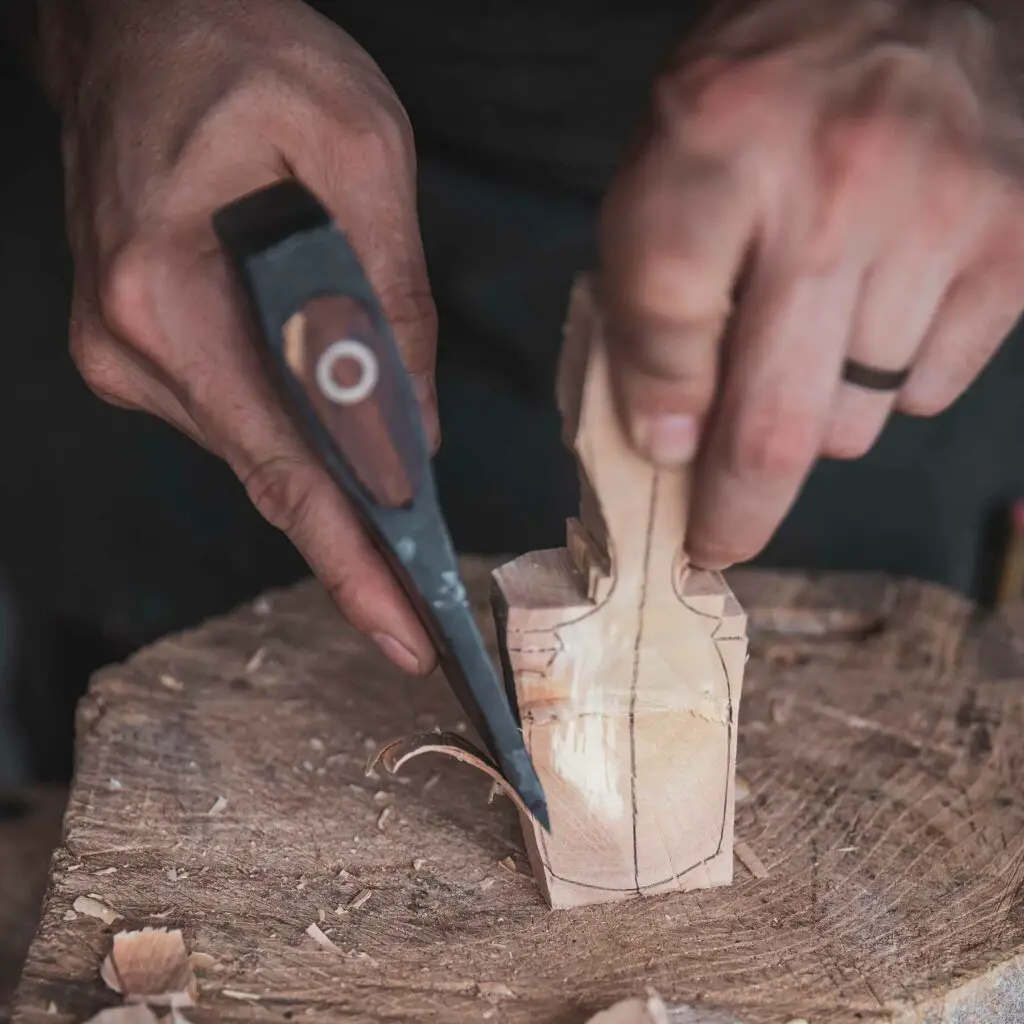
Drawing Cut:
When refining your workpiece down to a drawn line, you can place your finger along the cheek of the axe and take small slicing cuts, sometimes just from the wrist and using only the toe of the bit.
This gives you precise control and lets you “draw” to the profile of the workpiece.
How to Carve With an Axe
Using the techniques above, it’s easy to get started carving.
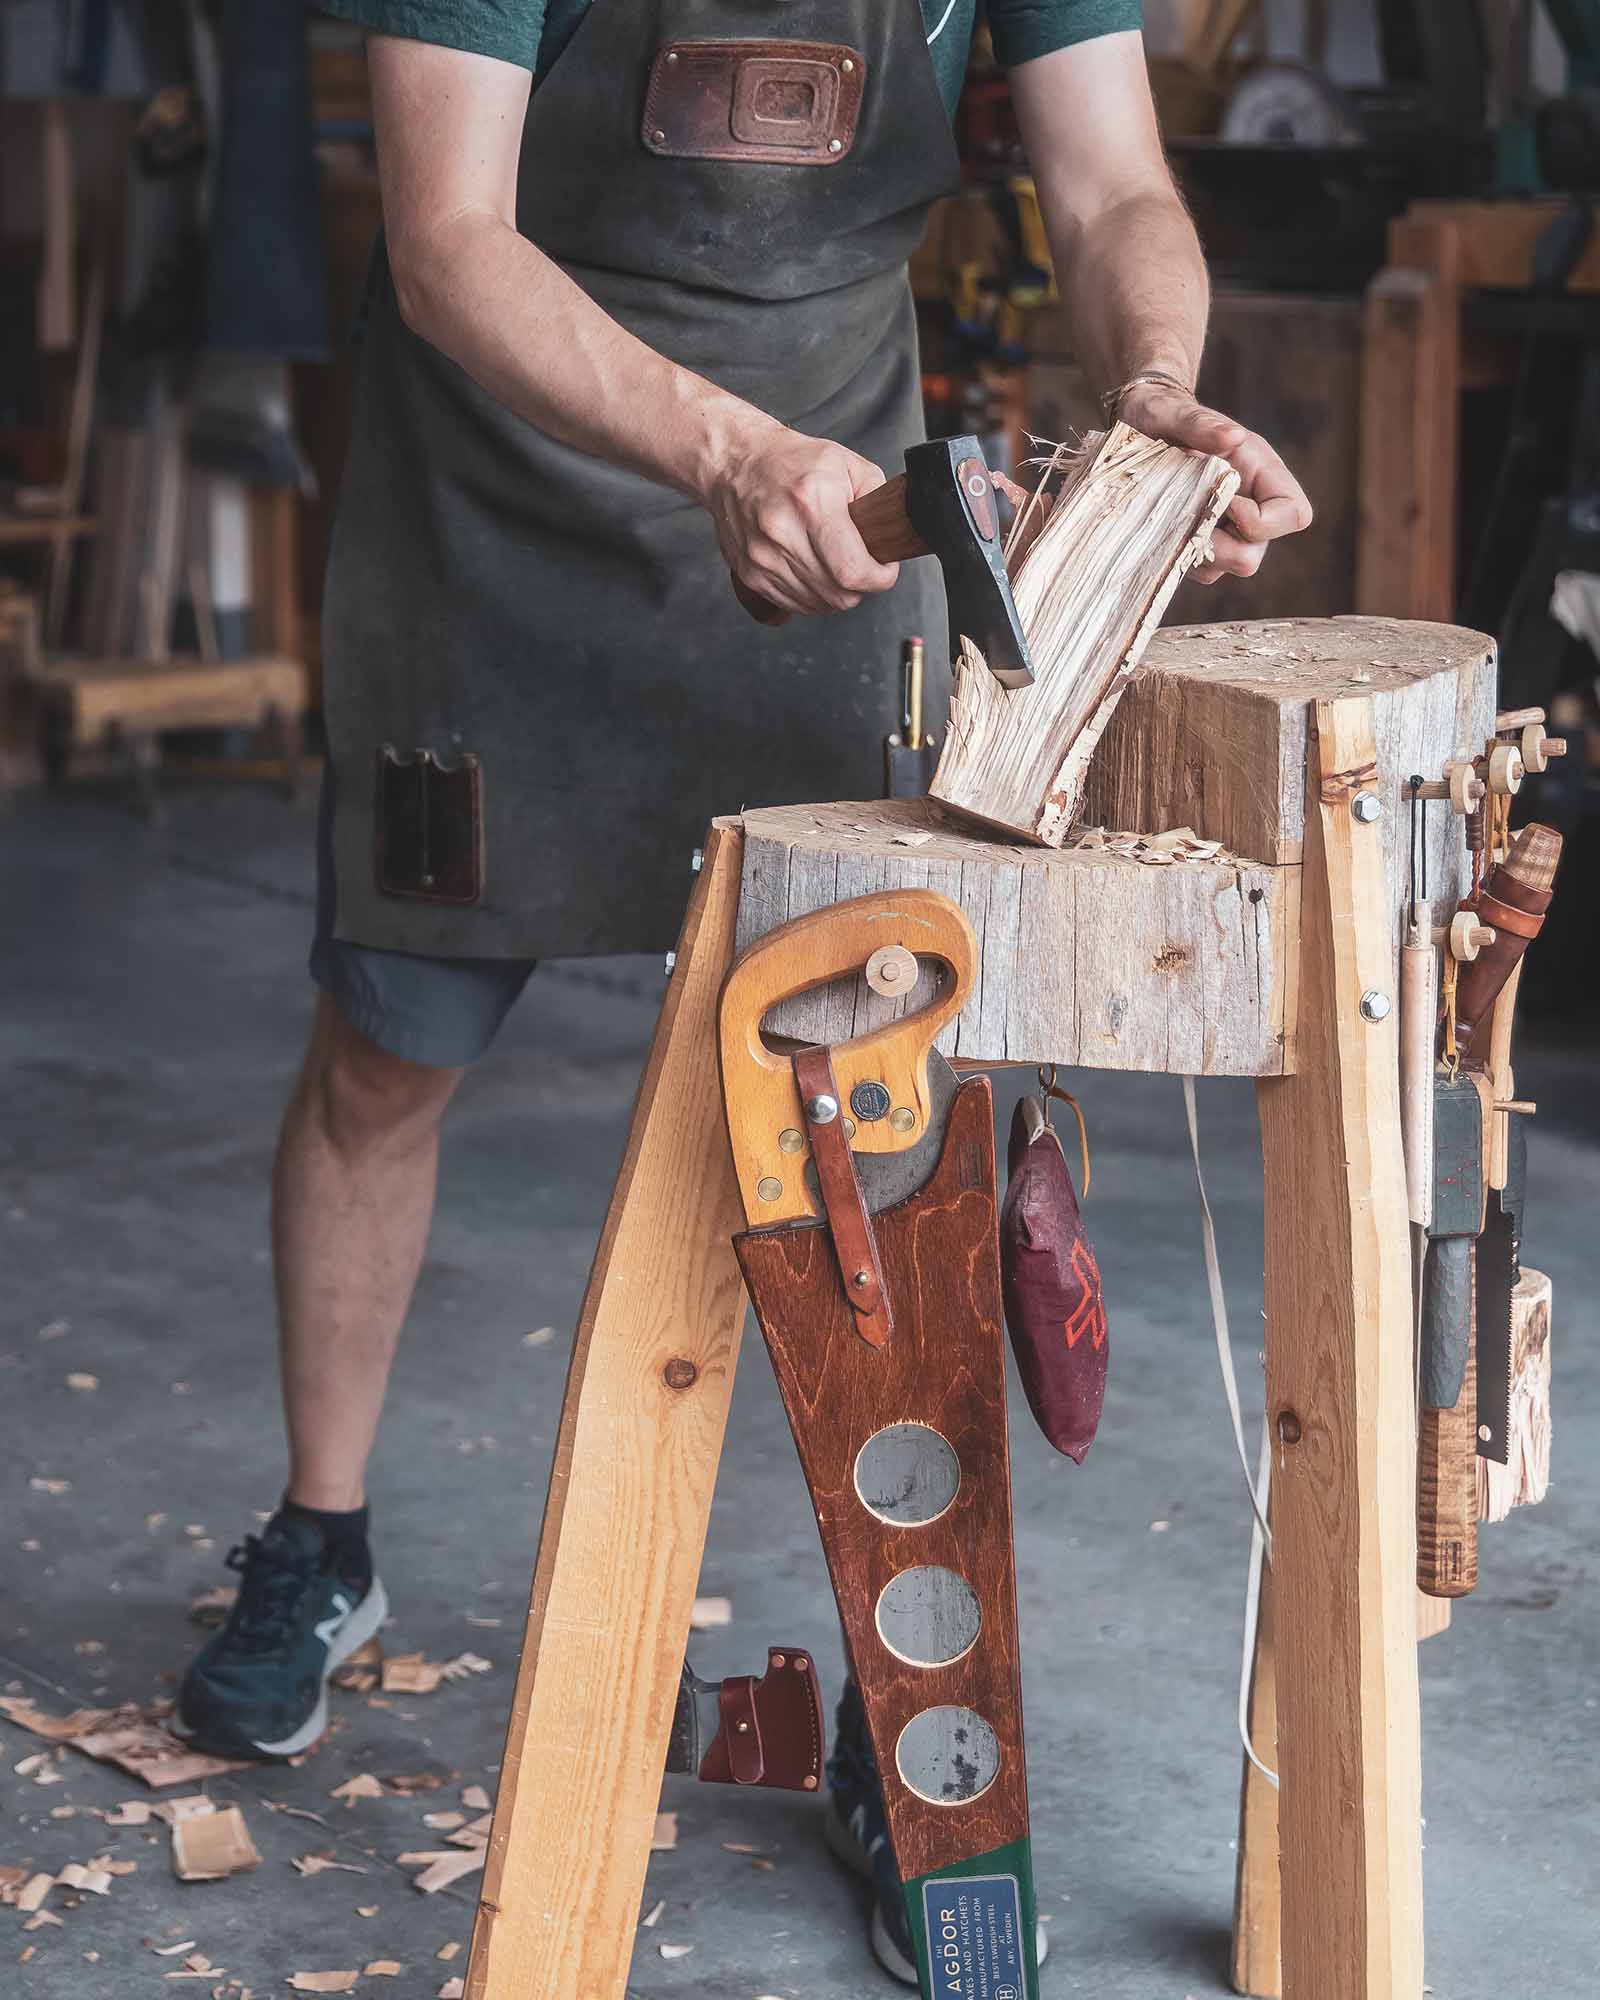
1. Prepare your Workspace
Whether you are in the woods or at your workbench, get set up for success:
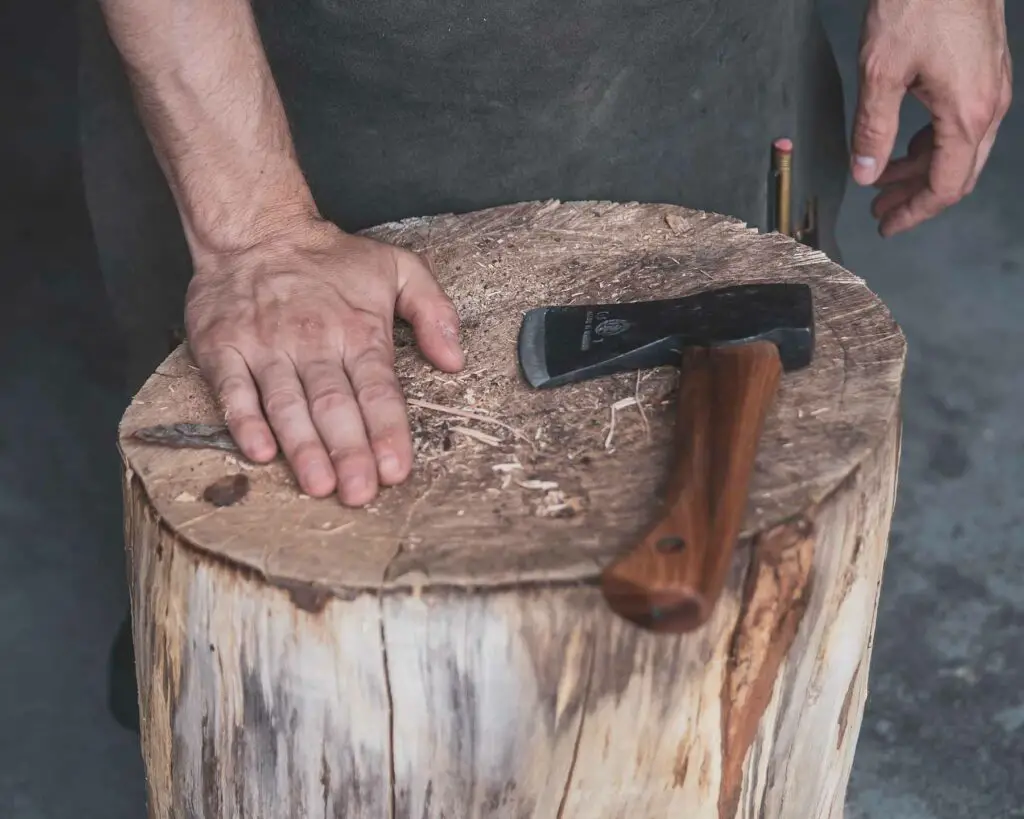
- Always carve on a wooden surface: preferably a flat, end-grain block. End grain is more forgiving to your axe edge, and a flat surface limits the chance of your workpiece skidding off.
- Place the workpiece toward the back of the carving block when possible so that any glancing blows land in the block, not you.
- Clear room to move: make sure you have room to easily move around your piece to put your body out of harms way. As mentioned earlier, when carving with the axe in your right hand, keep your right leg extended back and out of reach of an errant blow.
2. Prepare your Billet

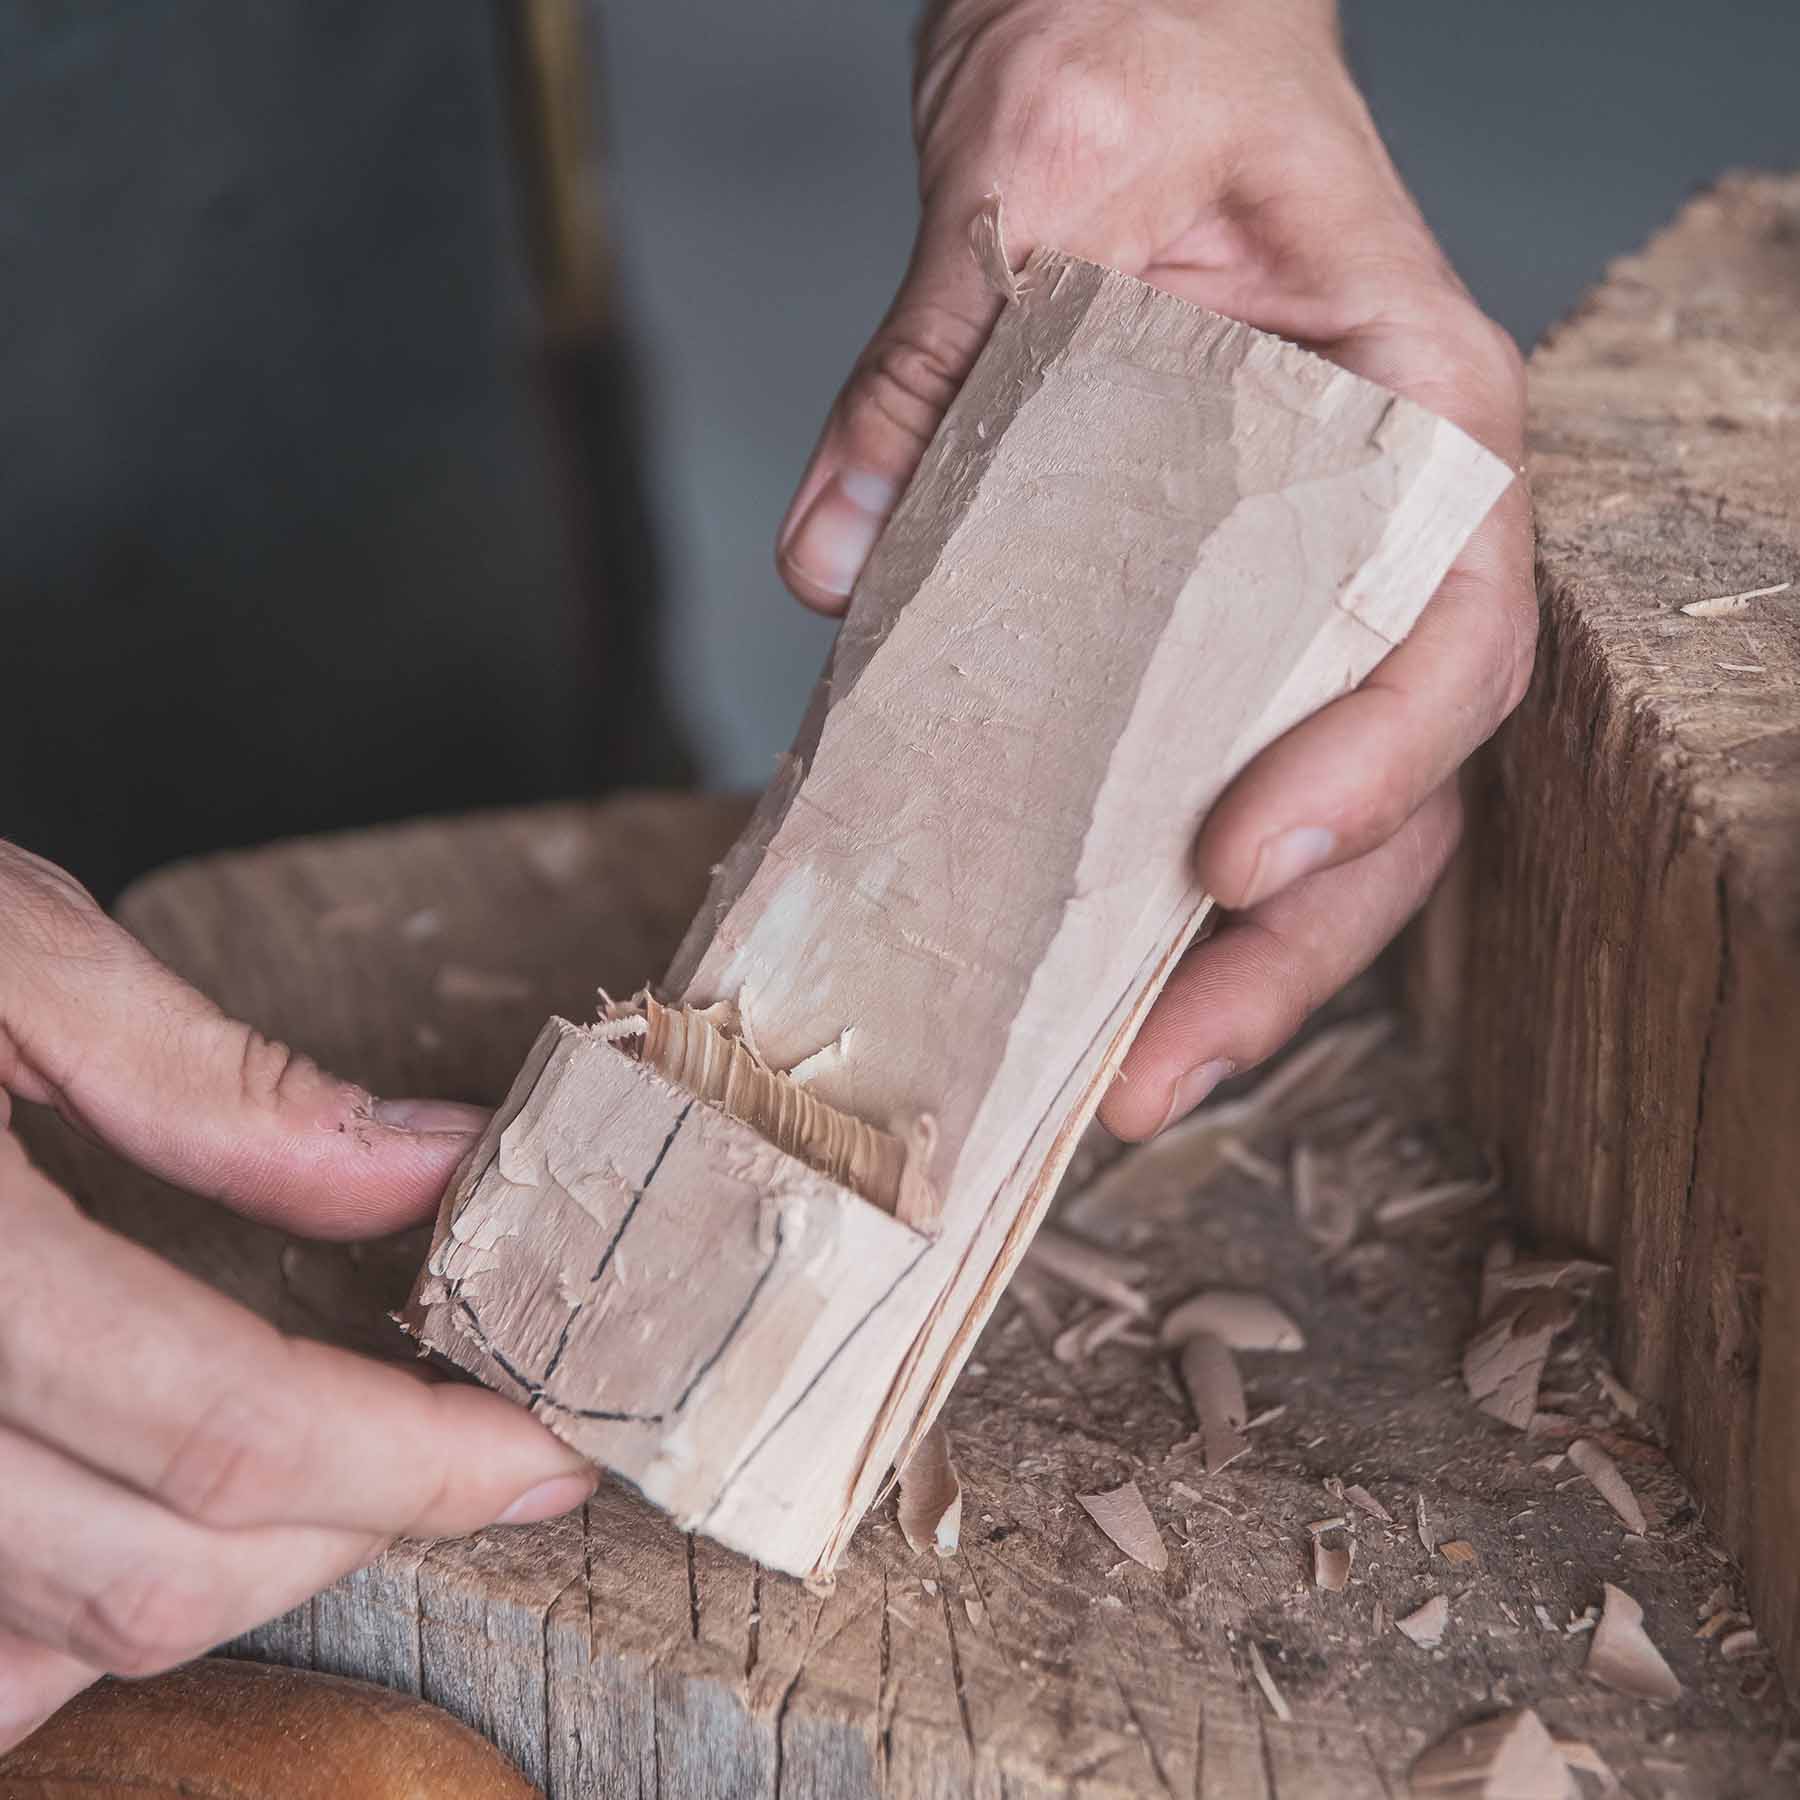
The piece of wood you are carving is called a billet, and the billet should be greenwood (fresh cut) whenever possible.
Greenwood is full of moisture and carves MUCH easier. It’s also much easier on your tools and body. Objects like spoons are generally rough-carved green with an axe and knives, allowed to dry for a few days, then finish-carved to produce a glassy surface that green wood can’t produce.
- Sometimes a second axe is used to split the workpiece and remove the bark, as the end grain tends to pick up a lot of dirt and grit. (That’s what I use my Gerber hatchet for.)
- Always check the cross-cut end grain of your workpiece for dirt. Brush it off or saw a fresh end before moving to the carving block. Dirt and grit that collects on your carving block will wreak havoc on your keen-edged carving axe.
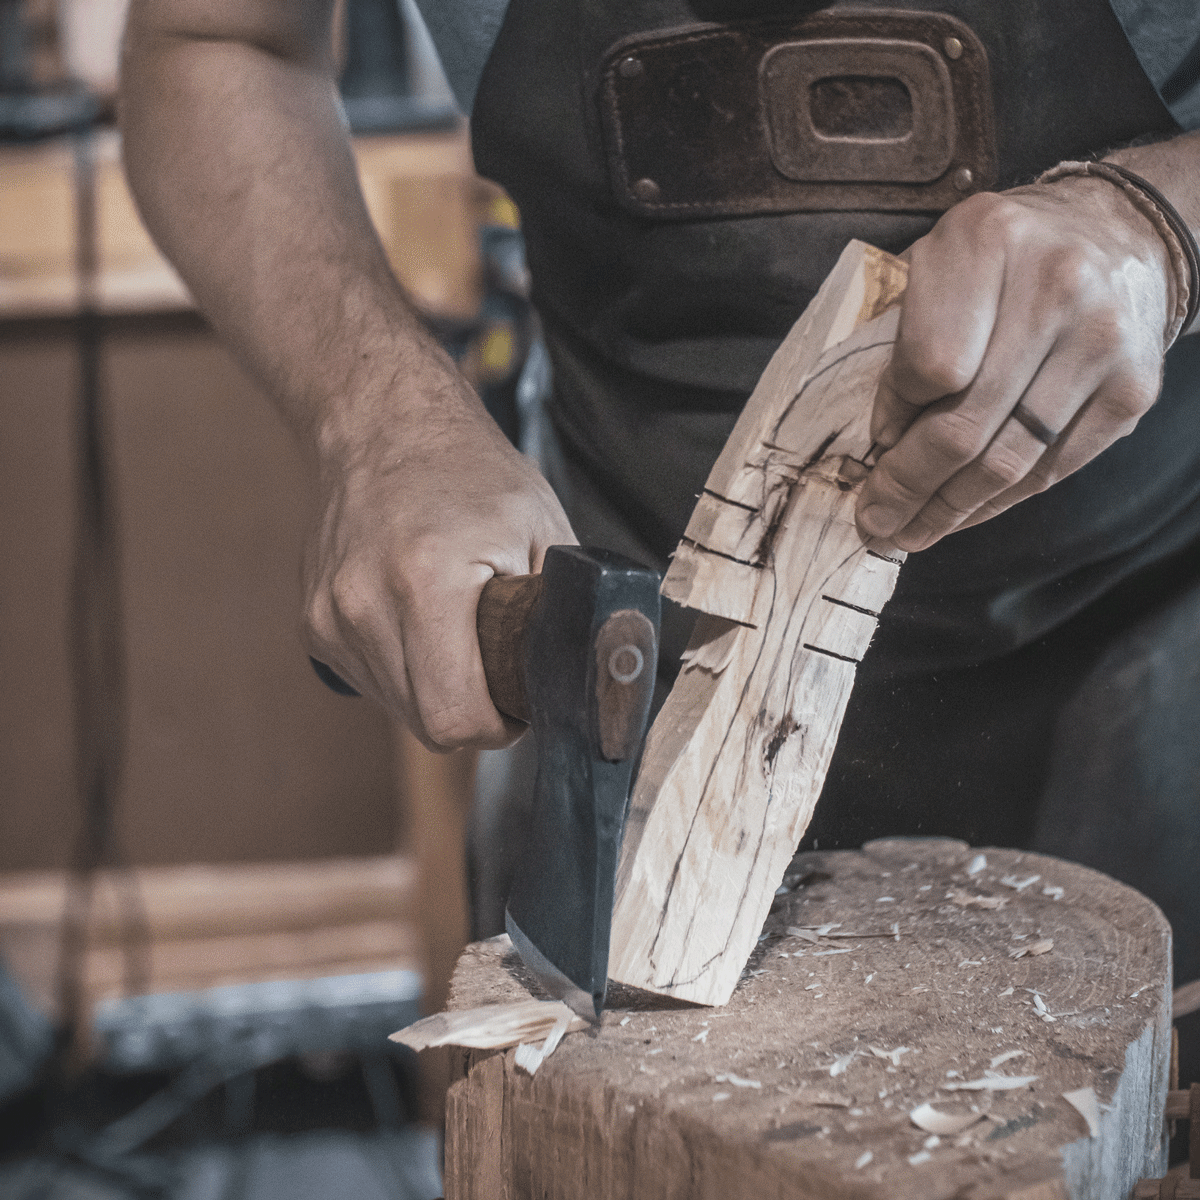
- When splitting a workpiece, orient the handle of the axe parallel to your shoulders and baton (hit) the poll with a piece of wood. That way if anything slips, the axe clears to either side of you rather than into you. Also, always split atop a solid piece of wood, be it your carving block or a dedicated splitting block.
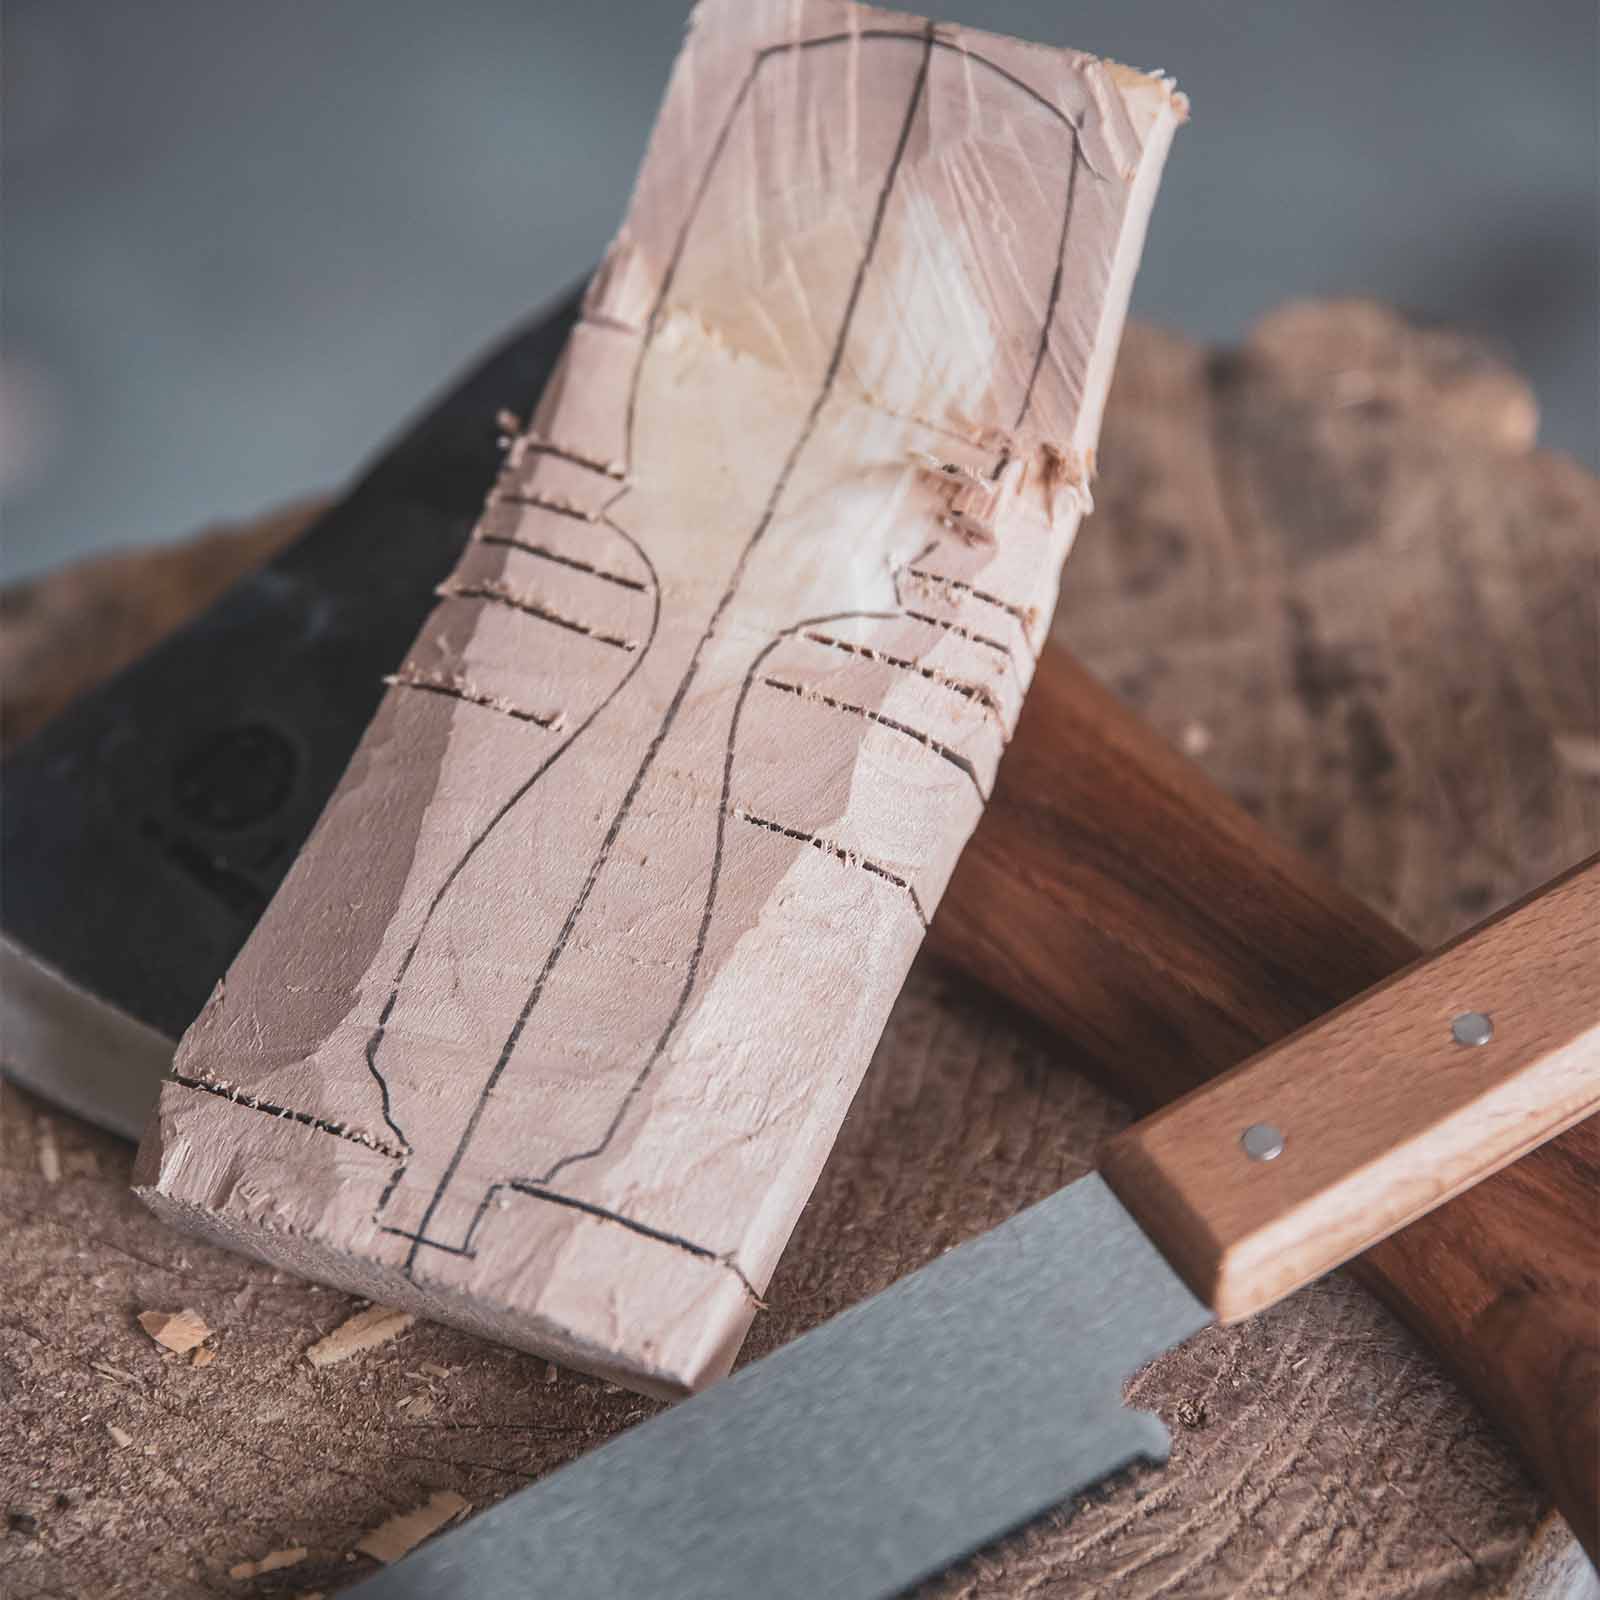
3. Draw in your shape
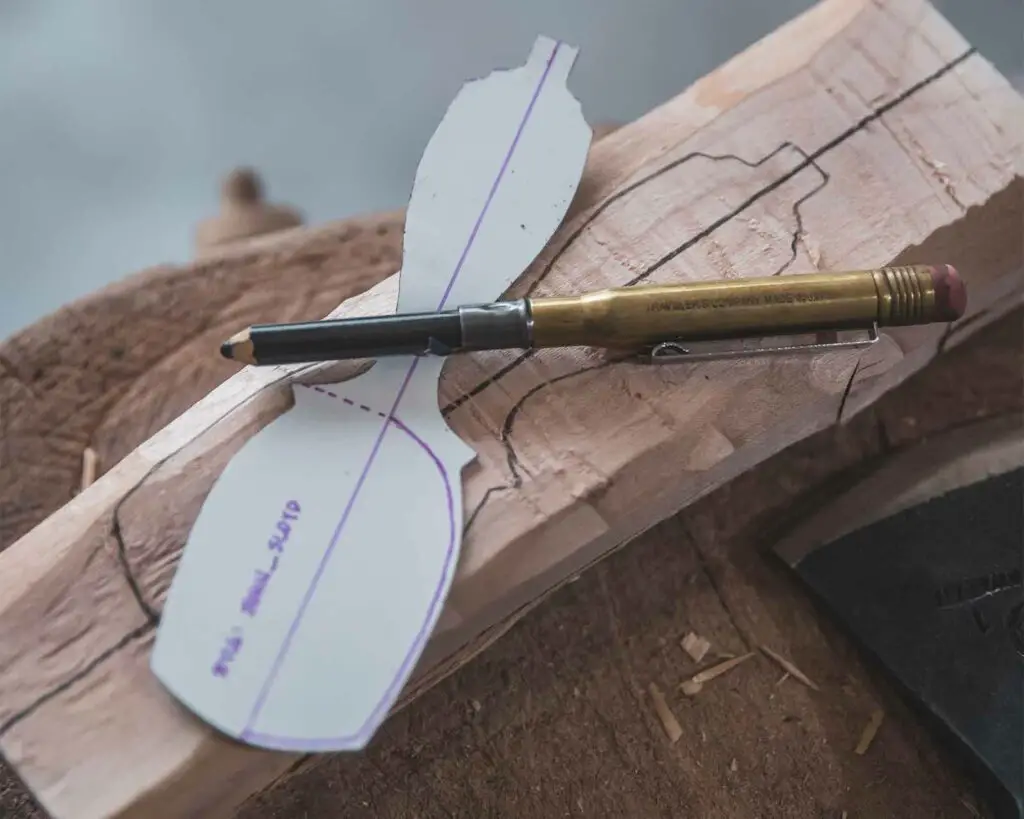
It can help to draw an outline of your project on the billet before you get started.
If you need to draw guidelines on your workpiece, watercolor pencils work great, especially on green wood.
4. Start Carving
Start by removing large amounts of material to rough in the shape of your piece using the techniques learned above (like jog cuts)
Then move to some of the finer techniques to refine the shape, like guillotine, planing, and draw cuts.
Depending on what you are carving, you may want to switch to a knife for the finishing touches.
- Remember to keep a relaxed grip and place your thumb along the side of the axe handle, not on the back.
- As chips collect on your carving block, be sure to clear them. Also, if a chip sticks to your axe, stop immediately and clear it. Even a small chip can cause the axe to deflect.
Additional Tips
While I wouldn’t call myself an expert, I do still have all my fingers. Here are some guidelines and tips that govern how I carve with an axe:
- Keep a first aid kit stocked, nearby, and know how to use it.
- If your axe doesn’t have a mask (sheath), make one. When you’re not swinging the axe, put the mask on it.
- If you’re not feeling confident, walk away and try again later. Feeling overly confident? Same advice.
- If you make a carving block, a good rule of thumb is that it should be the same height as your knuckles with your fist held at your side. I like a block with an extra raised section at the height of my flat palm as well.
- If carving on your knees, the same dimensions apply. Different considerations are often required when carving longer items like canoe paddles or bows.
Now you are armed with the basics, and all that’s left to do is practice, practice, practice.
Special Contributor

Curtis Isaacson
Craftsman, carver, axe restorer, and maker of artisan kit for roaming the wilds.
Special thanks to Curtis for providing his expertise & detailed photograph examples for this article. Check out his carving projects (as well as restored axes, kit, and leatherwork) on Instagram: @4estTrekker