How to Make a Leather Guard for an Axe Handle
This is just a hobby, but if you buy through a link I may get a commission that supports the site. Thanks!
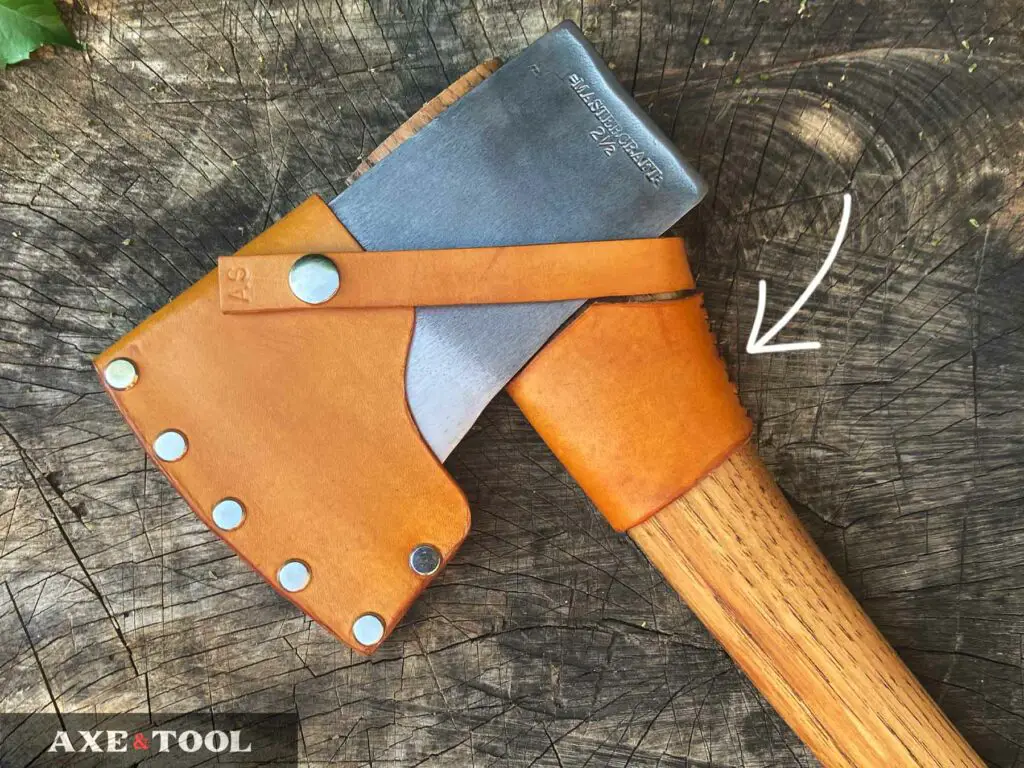
Leather guards (or collars) protect an axe’s wood handle from damage from overstrikes when splitting (hitting the handle off the target wood).
It’s pretty simple to make a leather guard for an axe handle, and I would much rather remake and replace a leather guard than have to make a new handle and rehang an axe.
I certainly don’t add them to all my axes, but they are great for camp or bushcraft axes that might get mixed-use or an axe going to a newer user who still has to learn proper technique.
What You Need:
These are leather working tools I to make a leather guard for an axe handle

Leather (8-10 oz / 3-4 mm)
Leather comes in different thicknesses, often measured in either ounces or mm. For overstrike protection, it should be at least 8-10 oz or 3-4mm. Buying a larger cut (like a shoulder) from a leather store is usually the best value, and will be enough leather for many sheaths/collars – but you can find smaller portions on Amazon as well (see leather options on Amazon).
This is just a hobby, but if you buy through a link I may get a commission that supports the site. Thanks!
Another choice is buying it pre-dyed or just veg-tanned. Factory-dyed leather will be much more even and make life easier. Veg-tanned leather will need to be dyed by you, but you have the option to get different dyes for different projects.
I use Fiebings Leather Dye with good results.
Lace or Thread
There are two main ways to secure your guard to your axe, thread or lace.
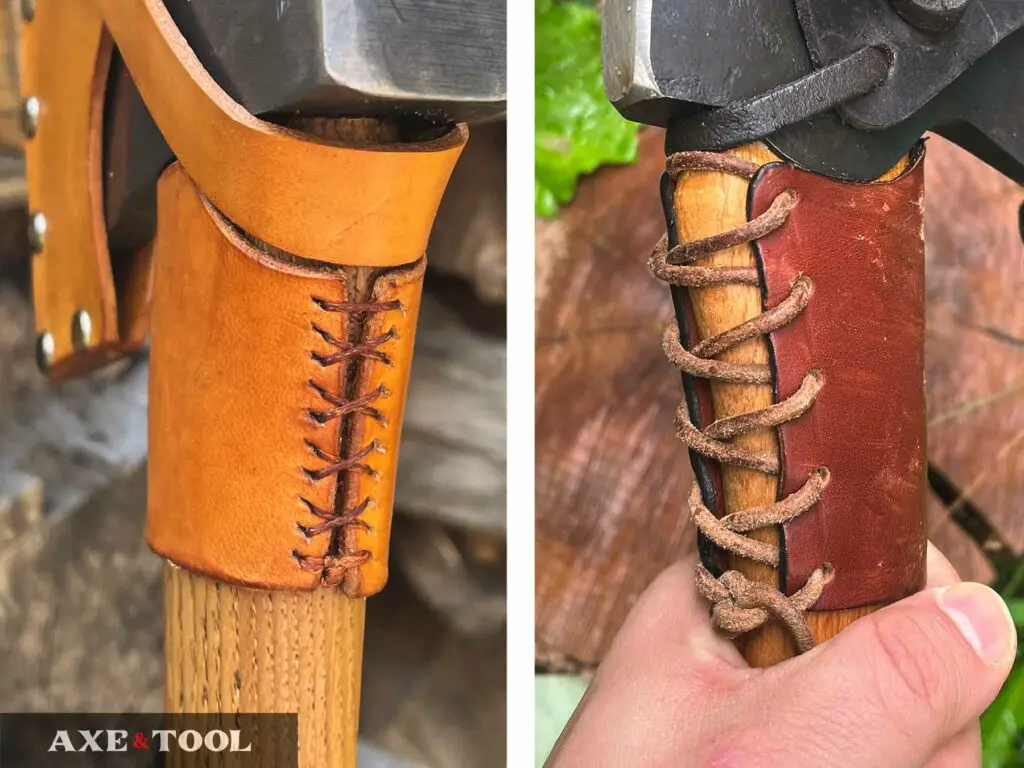
Waxed thread can be used to sew up the back for a more permanent guard. The benefits are the guard is much more streamlined and comfortable in hand when choking up on the axe. The downside is that once tightened and secured you may need to cut the threads to remove the collar.
Leather lace is much thicker, and is used for removable collars. The laces can be tightened and tied, and tucked into the guard. The benefit is you can easily remove the guard for handle maintenance, or to look for damage. The downside is it’s more awkward to hold, and more likely to come loose.
Basic Leather Tools
It doesn’t take much for a collar. It can be done with only an:
– Exacto knife for cutting out the shape
– Punch either for thread or for lacing
– Awl (helps with thread/lacing)
– Burnisher (optional).
– Leather Needles (if using thread)
I just got a cheap starter kit from Amazon (something like this). It’s worked fine for me for years – and it included threads. Although I think I had to buy needles separately.
There are other tools for design and detail work, but for this, we are keeping it simple.
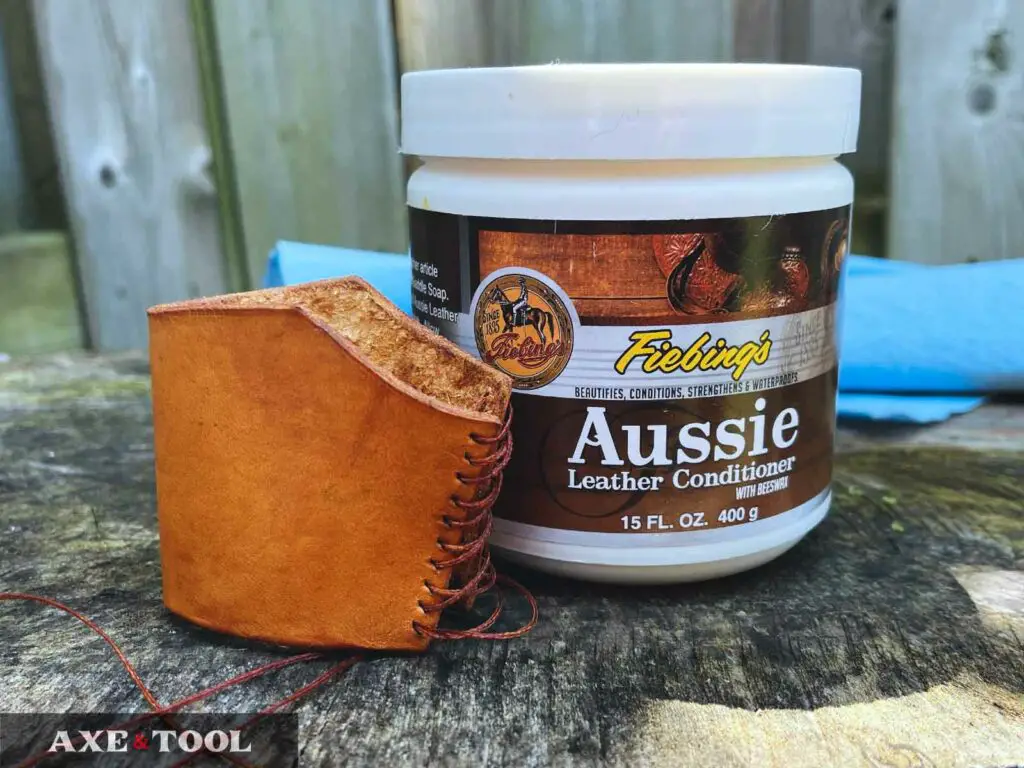
Leather Conditioner
A good leather conditioner keeps your leather soft, and strong and adds water resistance. I like and use the Fiebings Aussie Conditioner. One tub will last you a long time, and I use it on all my leather sheaths/guards/gloves – you name it.
Or you can make your own axe wax which can be used on the sheath and the rest of the axe as well.
1. Make a Paper Template
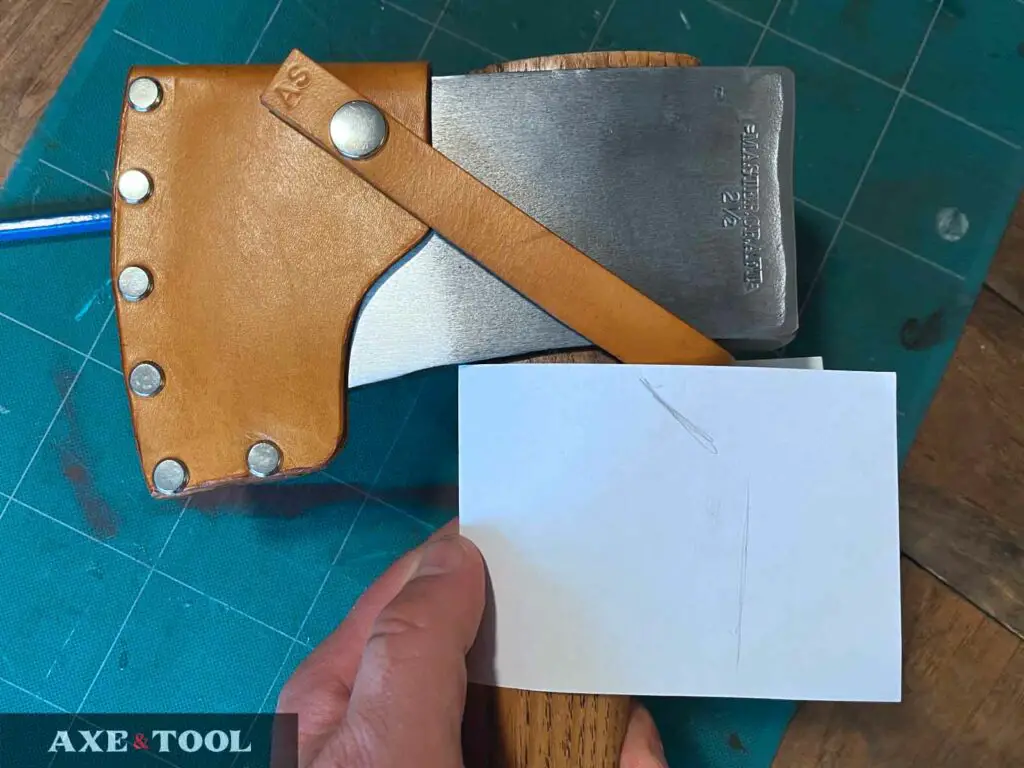
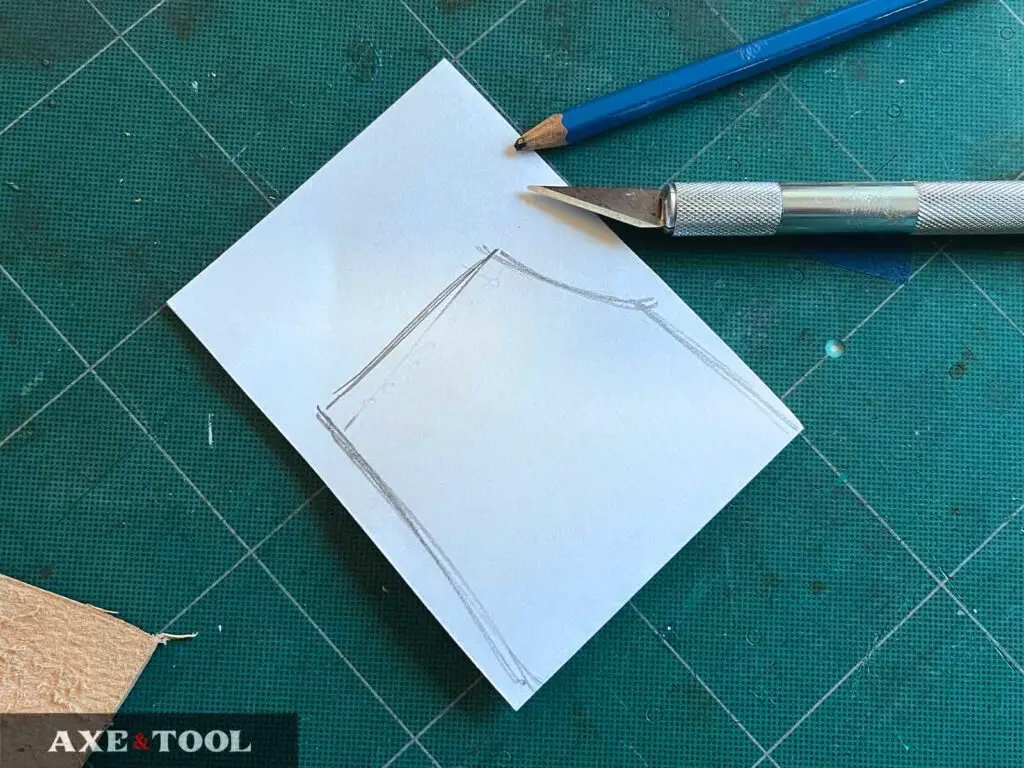
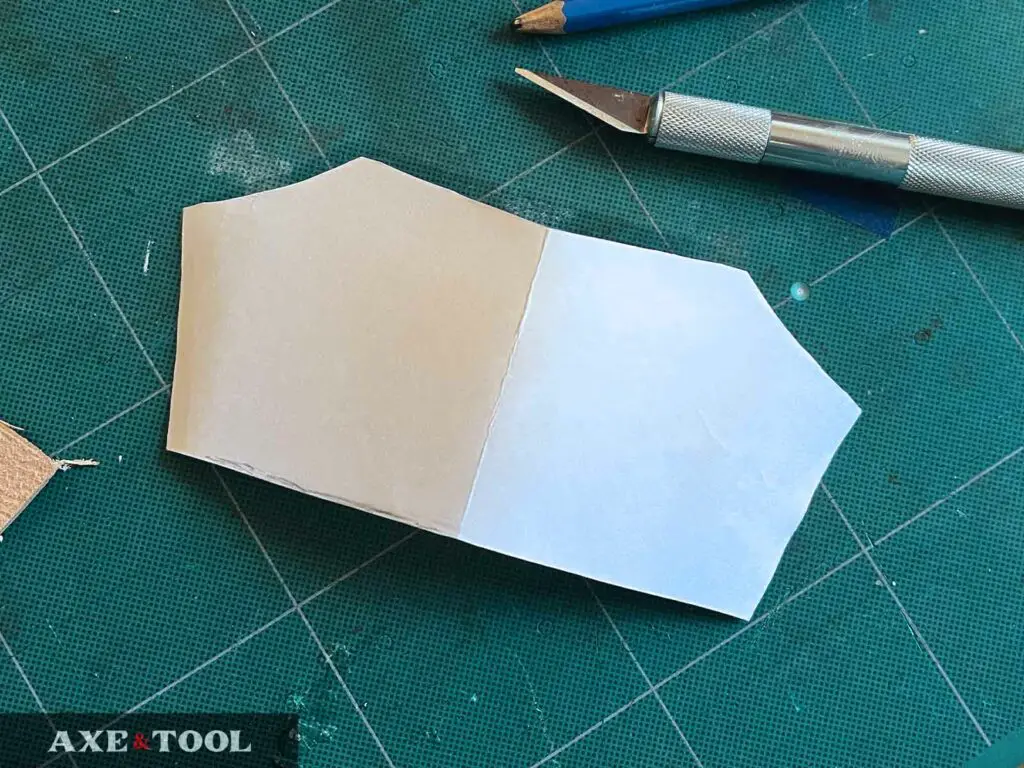
Leather is expensive, so start by first figuring out your design on paper.
Fold a sheet of paper in half, and line the crease with the front of the handle. Then trace the shape you need with a pencil on one side.
Take the paper off the handle, and with the paper folded cut out your template following the traced lines (this will keep it truly symmetrical).
Fit to the handle, mark any adjustments needed, and make a new version. It’s normal for this to take a few attempts to perfect, but it’s easier each time as you can just trace the previous attempt and make the tweaks.
Note: If you are using thread, you want the back of the collar too but up against each other (or close to it). If you are using lace, you should leave more of a gap.
2. Transfer the Design to Leather
Once you get the design dialed in, trace it to the back of the leather with a pencil. To avoid wasting leather, try and keep it as tight to the edge as possible.
Important:
It’s best to add a little extra padding on the outline, as the thickness of the leather will impact how closely it wraps around the handle. It’s easy to cut any extra off later, but impossible to add some back on if you cut it too small.
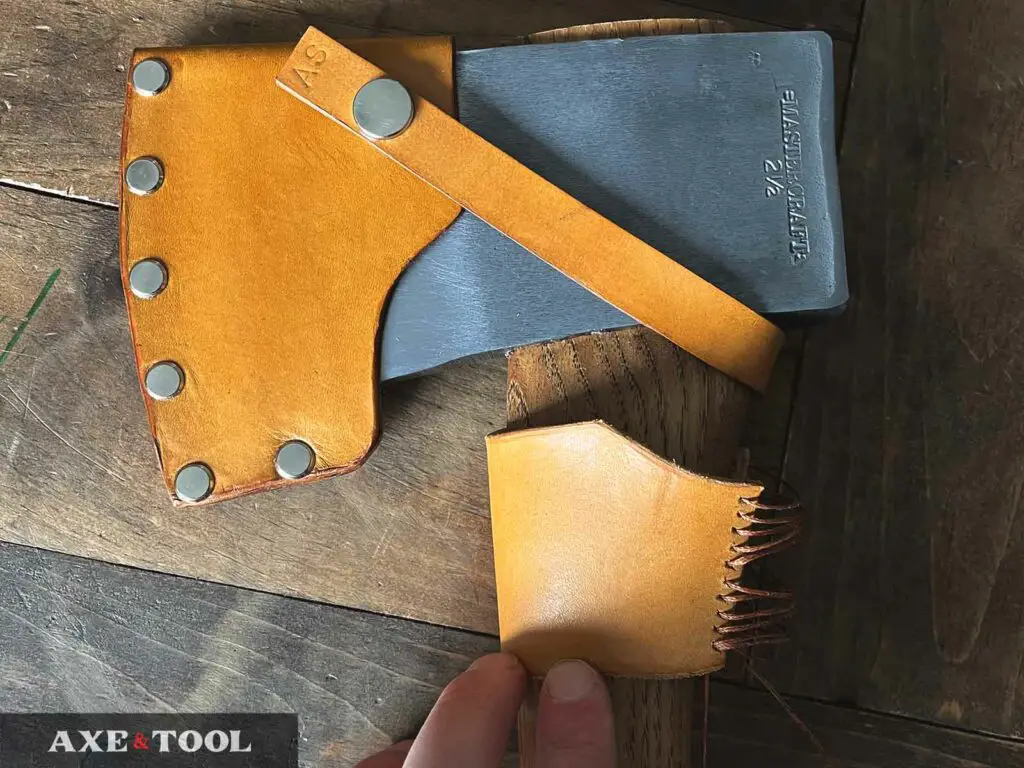
3. Cut out the Leather Guard
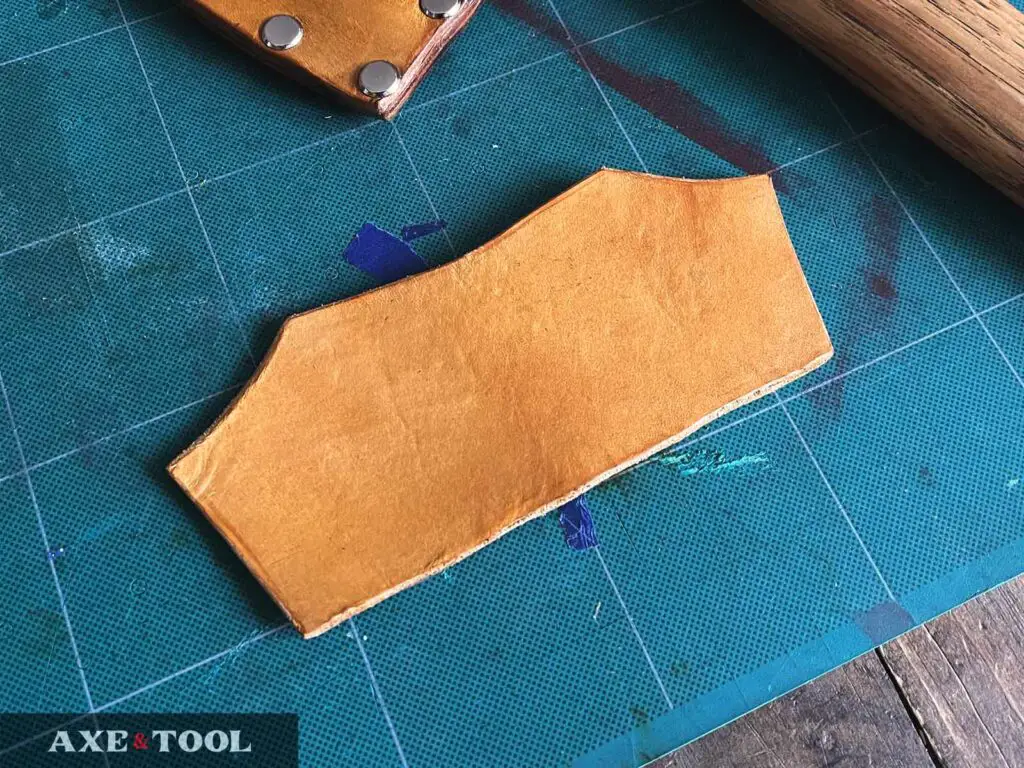
Once you have traced the shape, cut it out with a sharp exacto knife.
Test to make sure the new leather cut-out fits how it should on the handle, and do any final trimming if needed.
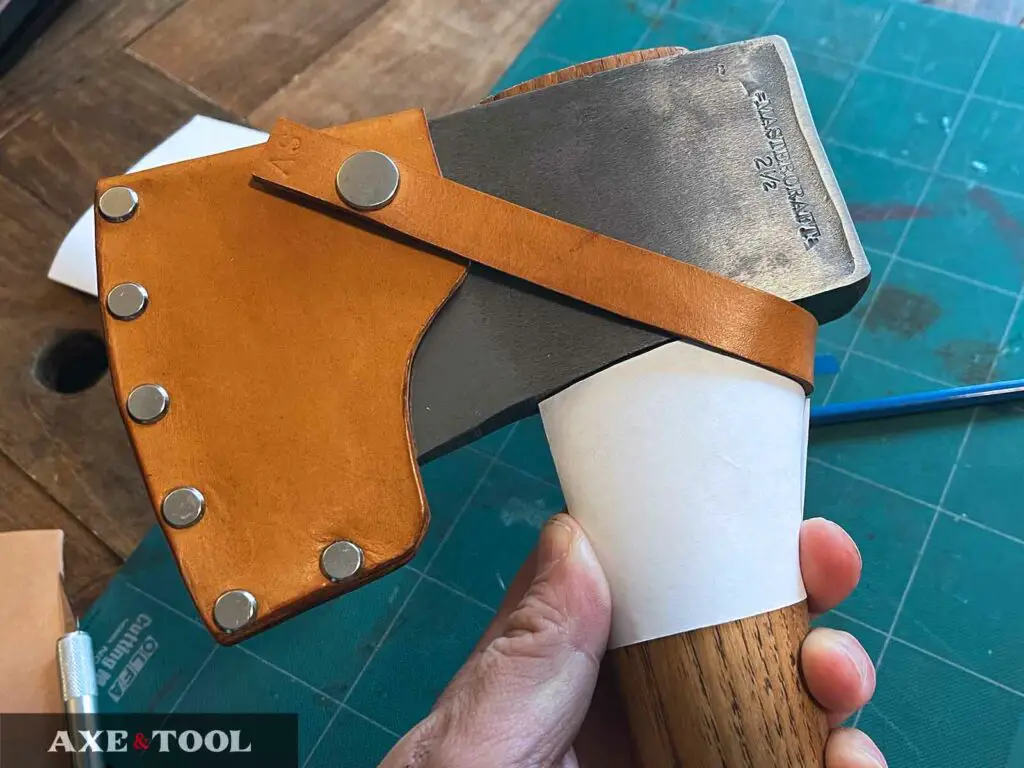
You can usually get a little stretch in the leather when actually fitting it to the axe. The guard shown here had a little over a 1/8″ gap at the back before fitting and lacing.
4. Add Lacing Holes
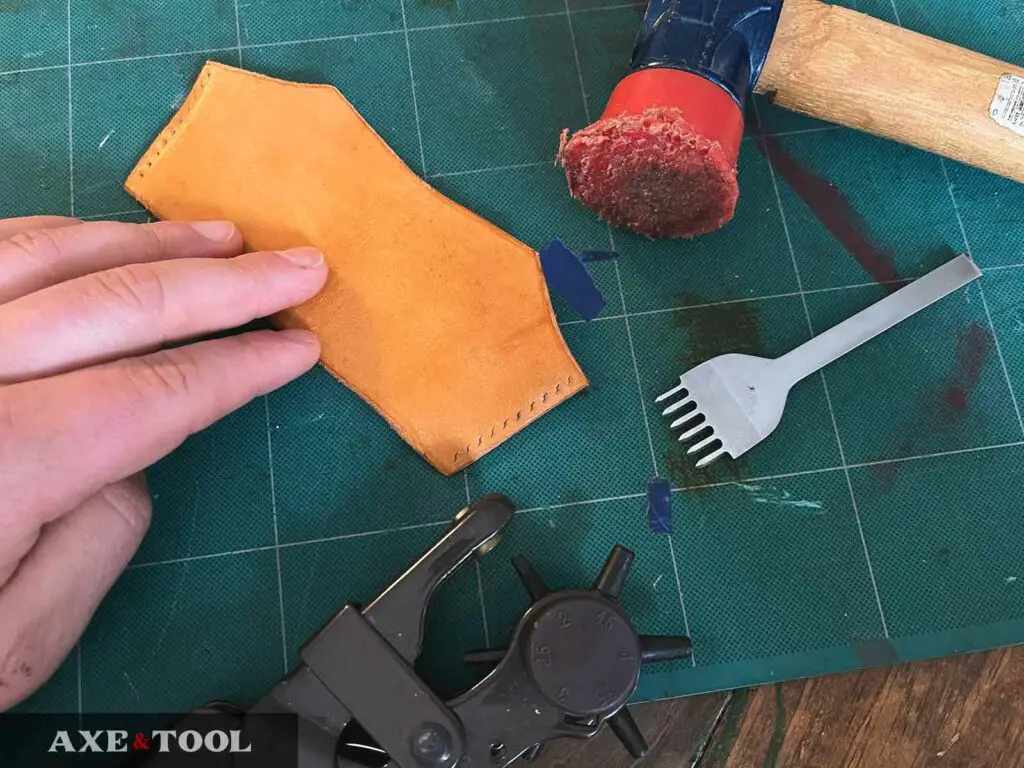
Next, use the appropriate type of punch to add holes for the laces or thread. The holes need to be in about 1/8th of an inch at least from the edge to make sure the leather is strong enough.
For thread, I prefer the fork-like punch (used above) as it’s the easiest way to keep the spacing consistent and going in a straight line.
For laces, you will need a wider hole punch. Most of the leather kits will come with a single-hole punch that you hit with a mallet to cut out the hole. But you can also get hand-held squeeze punches that are far less of a pain to use.
Do not use a drill to add the holes. I will use a drill press for sheaths sometimes if I am adding rivets or Chicago screws. But, drills make a mess of the leather. So it will look ugly and be more likely to tear out when the laces are tightened.
5. Detail and Dye (Optional)
If you are adding in any extra detail work, or need to dye your leather – now is the time to do it.
I use Fiebing’s leather dye, and the one shown in this post is “Buckskin” which I also diluted with water to brighten.
6. Wet-Form the Leather
You can use water to form the leather guard around the handle so that it naturally retains the proper shape and fits a little more snuggly.
Wet the guard with warm water and wrap it in place on the axe. The water will make the leather more malleable so you can pull it tight, and fit it to the exact contours of the handle.
If you soak or wet both sides of the leather, just hold it in place for 5 minutes before sliding off the guard and drying the handle (water left on the handle can pop the grain).
You can also do this step after you have laced the collar, and only wet the outside of the leather, before fastening it and letting it dry in place on the axe.
7. Condition the Leather
After the guard is dry, apply a leather conditioner to keep it strong, supple, and water-resistant. Simply wipe it on, let it soak in for 15 min, then buff off the extra.
This step is optional, but I highly recommend it. I add conditioner it to every sheath and guard I make. It’s as important as oiling an axe handle.
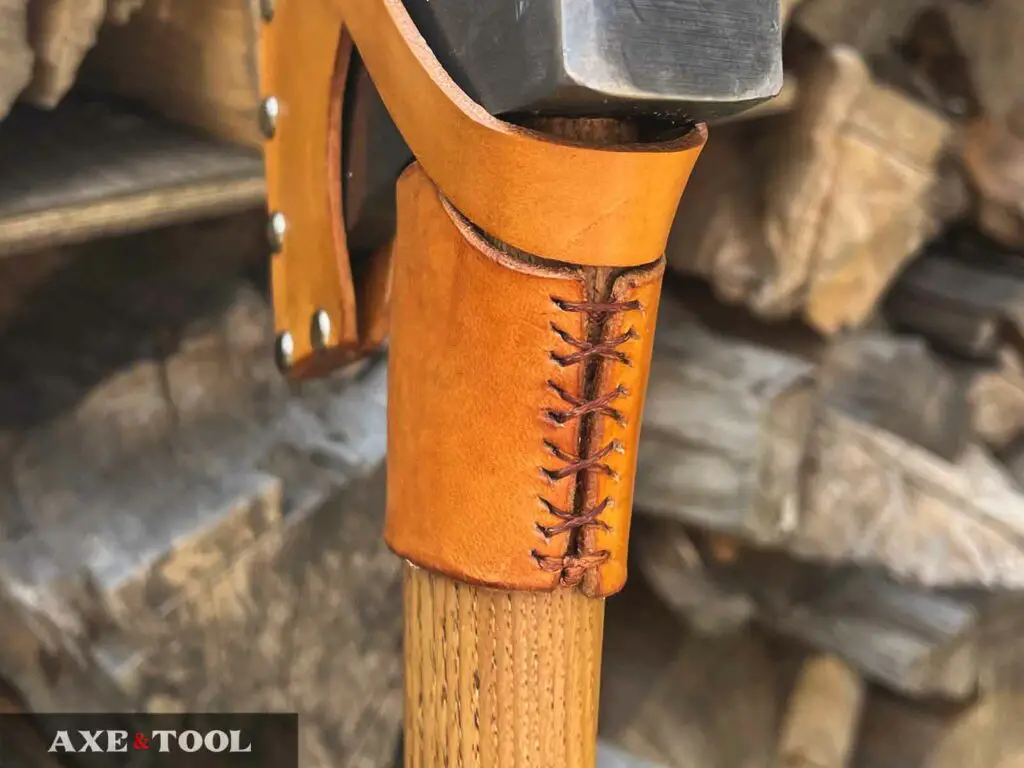
8. Loosely Lace the Collar
Add the lacing or thread in a criss-cross pattern starting at the top of the collar. Keep it loose so the collar will be able to fit over the palm swell and slide up the handle.
Use an awl to widen the eye holes so you can easily slide the lace or thread through. It will tighten back up on its own. If you are using thread, you will need needles.
Make sure you have extra thread or lace that hangs down from the bottom that can be used to tie and secure the guard once fitted.
9. Fit & Secure the Collar
Slide the guard up into position from the bottom of the handle, then tighten the lace or thread. Work your way down from the top, pulling tight so the collar doesn’t move. An awl can be used to slide under the thread and pulled up to help tighten threads.
Eventually, you should have two lines of thread or lace dangling down from the bottom, and it’s up to you to securely tie and knot them to keep the guard in place.
With thread, I tighten a tight knot between the bottom two eyelets and melt the ends together so they can’t come loose.
With lace I will tie a knot, and then try and tuck up and slide the remaining lace back up under the guard so it’s there if needed, but also out of the way.
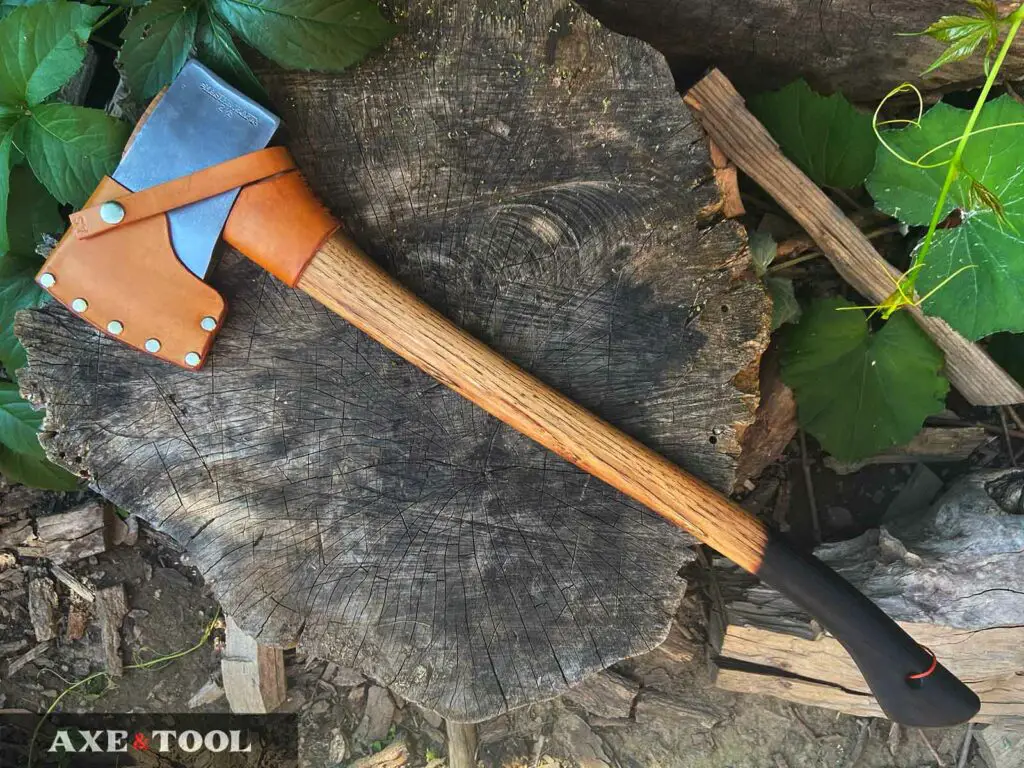
That’s it, you’re done.
Please comment below If I missed something or if you have any questions. I do my best to respond to everyone.
About the author:

About the author:
Jim Bell | Site Creator
I’m just a guy who likes axes. I got tired of only finding crap websites, so I set out to build a better one myself.
I’m also on Instagram: @axeandtool