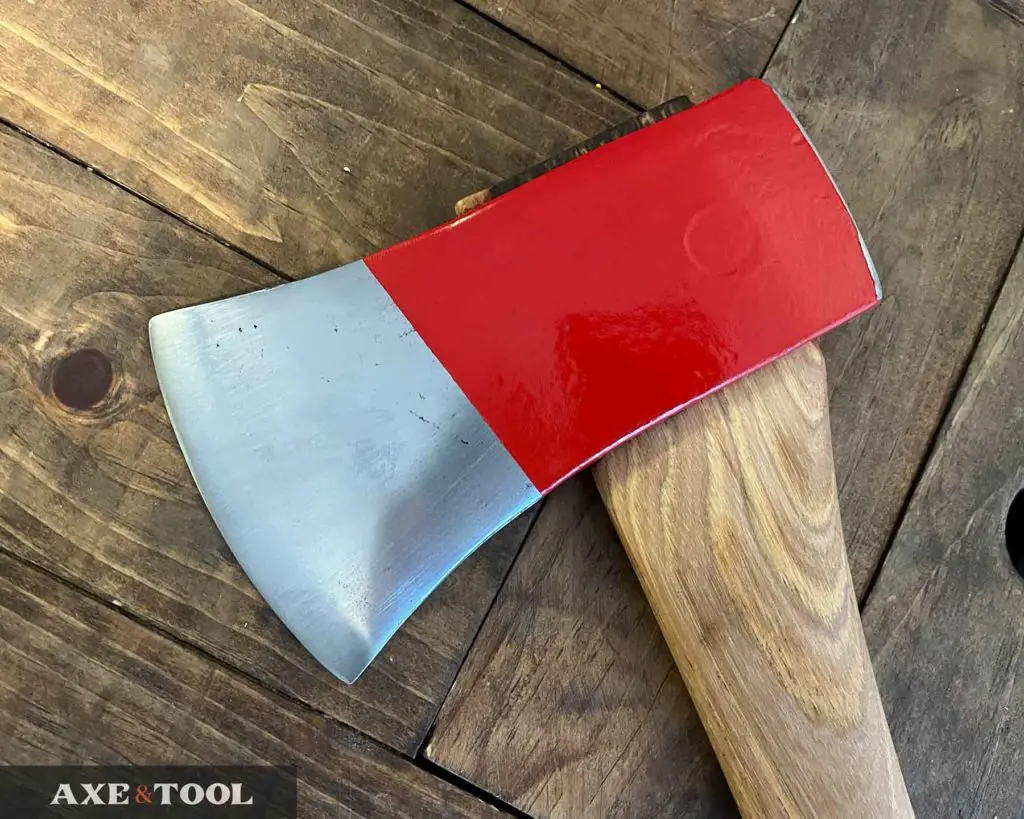
How to Paint an Axe Head: Tips For The Best Results
It’s not hard to paint an axe head – and yes you can just spray paint an axe as-is. But there are a few additional steps you can take to get the most durable finish.
But, it is important to know that even a strong paint finish will wear off with use.
This is just a hobby, but if you buy through a link I may get a commission that supports the site. Thanks!
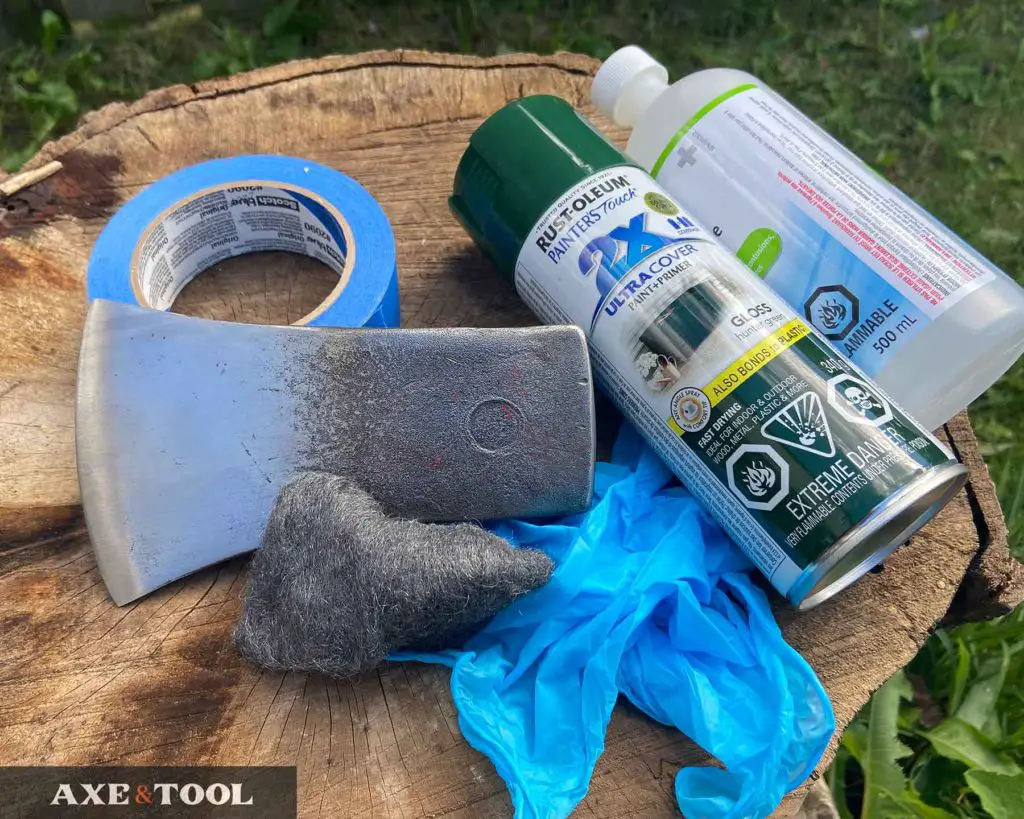
What you will need:
- Rust cleaning supplies (Oil, wire brush, etc)
- 100-grit Sandpaper (Fandeli packs are good value)
- Degreaser, acetone, or soap
- Blue Painter’s Tape (0.70″ ScotchBlue)
- Decent Spray Paint (Rustoleum)
Additional options:
- Gloves to keep clean
- String or wire
- Spray Varnish (gloss or semi-gloss)
Tip #1: Axe cleaning supplies
This will largely depend on the state of your axe/axe head. But WD40, steel wool, scrub brush, sandpaper, wire wheel – all usual suspects. You will need to remove any existing rust, sap, or dirt.
Tip #2: Degreasing options
It’s best to remove any oils from the axe head as it can interfere with the paint bonding to the metal. Just the oils from your hands can cause issues, but especially if you use any oils to clean the axe.
I prefer acetone as washing with dish soap can lead to flash rusting. The cheapest and easiest way to get acetone is nail polish remover. It may already be in the house, or it’s easy to find (amazon).
Tip #3: Get the right tape
Blue painter’s tape produces a clean edge. I like using the thinner 0.7″ width (this one), as it’s easier to keep a consistent line, but 1″ is also fine.
Green painter’s tape or anything else will let paint bleed under, and result in a “fuzzy” edge (or worse).
Tip #4: Don’t cheap out on the paint
Don’t use the cheap off-brand spray paint. There IS a difference, and I’ve found out the hard way. It can be flaky, bubbly, and inconsistent. I use Rustoleum Painter’s Touch – the glossy finish, it’s smoother, stronger
Step 1: Clean Rust Off the Axe
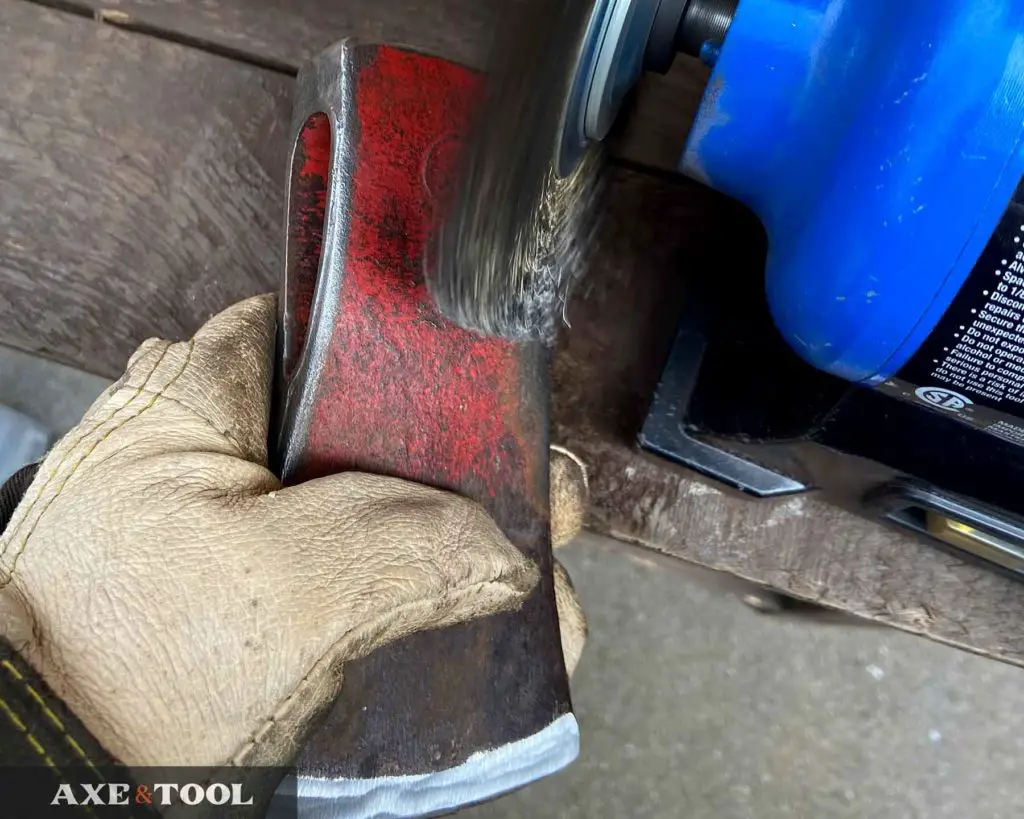
Make sure the head is clean of any dirt or sap, and completely rust-free. Any remaining rust can eat away at the steel from under the paint (that’s bad).
For really old heads you can choose to leave or remove a thick Patina. As long as active rust is removed you should be good.
The best way to completely get thick rust and paint from an old head is with a wire brush attachment for a power tool, like a bench grinder, angle grinder, or even drill. The wire brush can get in all the little scratches and pitting. But a handheld brush or sandpaper works too.
You do not need to completely remove old paint, but I would at least go over it with some 100 grit sandpaper to make sure you get anything that’s loose. Either by hand or with a foam-backed handle.
If the head is not on a handle be sure to clean inside the eye as well – this can be tricky. Try rolling some sandpaper into a tube and using that to clean off any interior rust.
Step 2: Roughen the Steel
Rough up the exposed metal that is going to be painted with 150-220 grit sandpaper. Just do it by hand, using mixed hand motions (not just one direction).
If you end up sanding the edge of the painter’s tape (it happens) you may want to remove the existing strip and apply a new piece to ensure the cleanest edge.
Step 3: Degrease the Head
Finally wipe down the exposed steel with hot soapy water, acetone, or a degreaser to remove any remaining oils. Again I like acetone the best, but use what you have.
It’s easier to avoid new contamination if you wear gloves from this point on, but you can otherwise just hold the taped areas.
Step 4: Mask the Axe
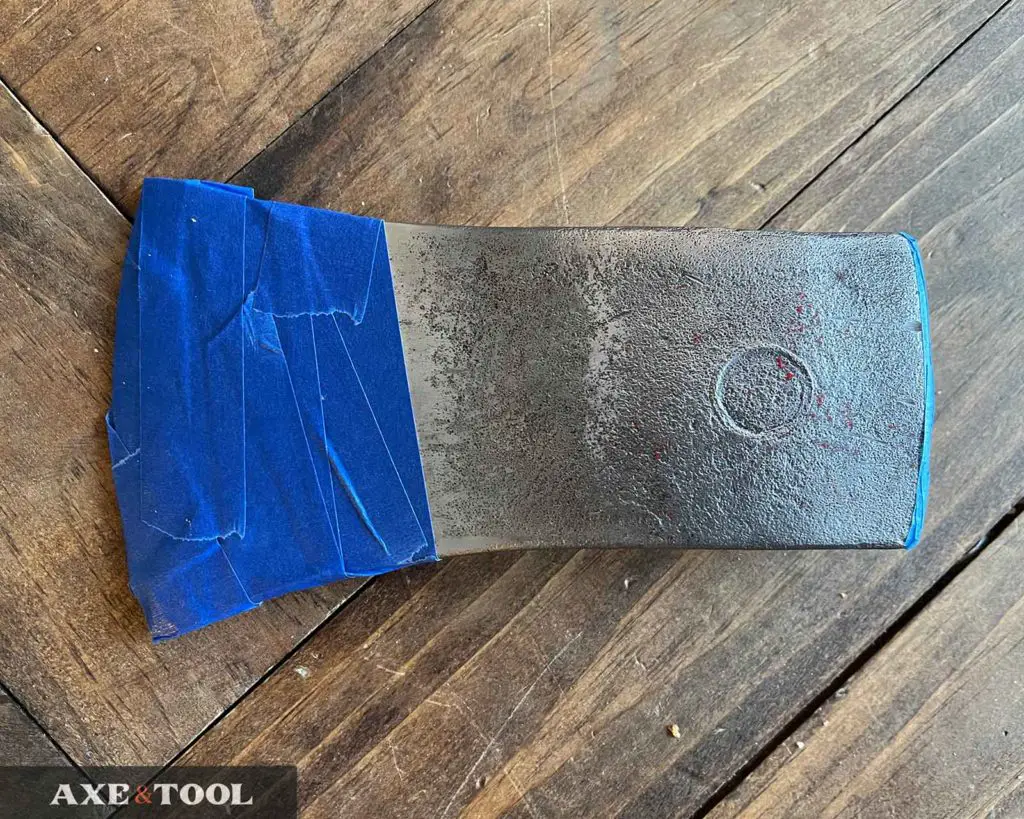
Cover the bit (blade) or any area of the axe you want to remain unpainted using the blue painter’s tape.
If you are painting an axe that is on the handle, you can cover the handle with newspaper or plastic wrap, but tape tightly around the eye.
Handled axes: try to tape over the end of the handle that is sticking out the eye. This will leave the grains exposed so you can continue to oil the handle properly in the future, which will prevent a loosening of the head.
Step 5: Warm the Axe (Optional)
This is a skippable step. But ideally, you should warm the head right before painting the first coat of paint to around 100F (or as close as possible).
Axe head only:
If you are prepping a loose head you can just stick it in the oven for a few minutes.
Prep your painting supplies and area BEFORE you start heating the axe head so you are ready to go as soon as it comes out.
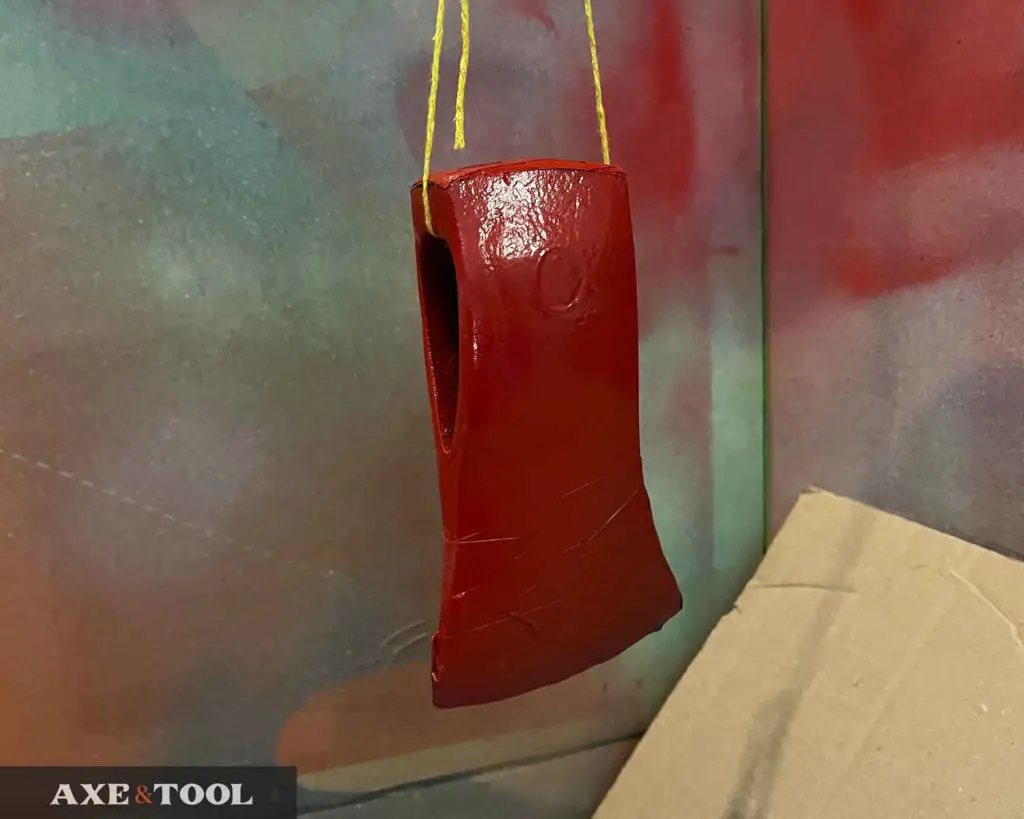
TIP: Tie a piece of wire through the eye into a big loop before so you can quickly pick it up and hang it for spraying. Don’t use string (like I did below), the fibers get stuck in the paint.
Handled axes:
DO NOT put your handled axe in the oven, it will be bad for the handle and could loosen the head. Just put the axe in the sun for a while if it’s hot out, or just skip this step.
Step 6: Hang Axe for Painting
Axe head only:
Use a wire or string to hang the axe head in your spray area – this is the best way to be able to spray all sides at once and create a consistent finish. You could also hang it on a stick or clamp the bit to something.
If you need to lay the head flat to spray – no problem, it will just take more time as you will need to spray each side one at a time. If you do it this way you can skip the heating step since it will be inconsistent.
Handled axes:
If your axe has a lanyard hole, you can hang it from there or clamp the handle so the head can be sprayed from all sides. No worries If you can’t do this – just lay it flat and spray one side at a time.
Step 7: Paint the Axe
Shake the can vigorously before starting to spray to avoid build-up and inconsistencies.
Spray 3-4 light coats from about 12” away, leaving plenty of time for each layer to dry in between.
The key here is LIGHT coatings. I would rather do 6 coats that are too light than 3 that are too thick. It’s okay if you still see some steel even after a couple of coats.
If the paint goes on too thick it will run or pool, and that will interfere with the overall bonding process (and just not look as nice). Thick paint is also more likely to seep under the painter’s tape. So just build it up nice and slow, giving it enough time to dry between each coat.
Leave between 20 – 40 minutes to dry between each coat. Rustoleum says specifically to do additional coats within an hour of the previous spray or leave it for a couple of days.
You can spray the inside of the eye – or not. I usually only try on one or two coats, but it’s not needed at all.
Step 8: Let the paint set
If you want the best finish I can’t stress this enough – give your axe LOTS of time to dry.
Once you have applied the final coat, let the paint really harden for at least two days before hanging or using the axe. Even laying it on a surface will slowly warp coating, so it’s best to let it dry hanging as well.
Even after hours of drying, laying the head down on a surface can cause the paint to shift and imprint texture (although it will seem firm to the touch).
Boom you are done.
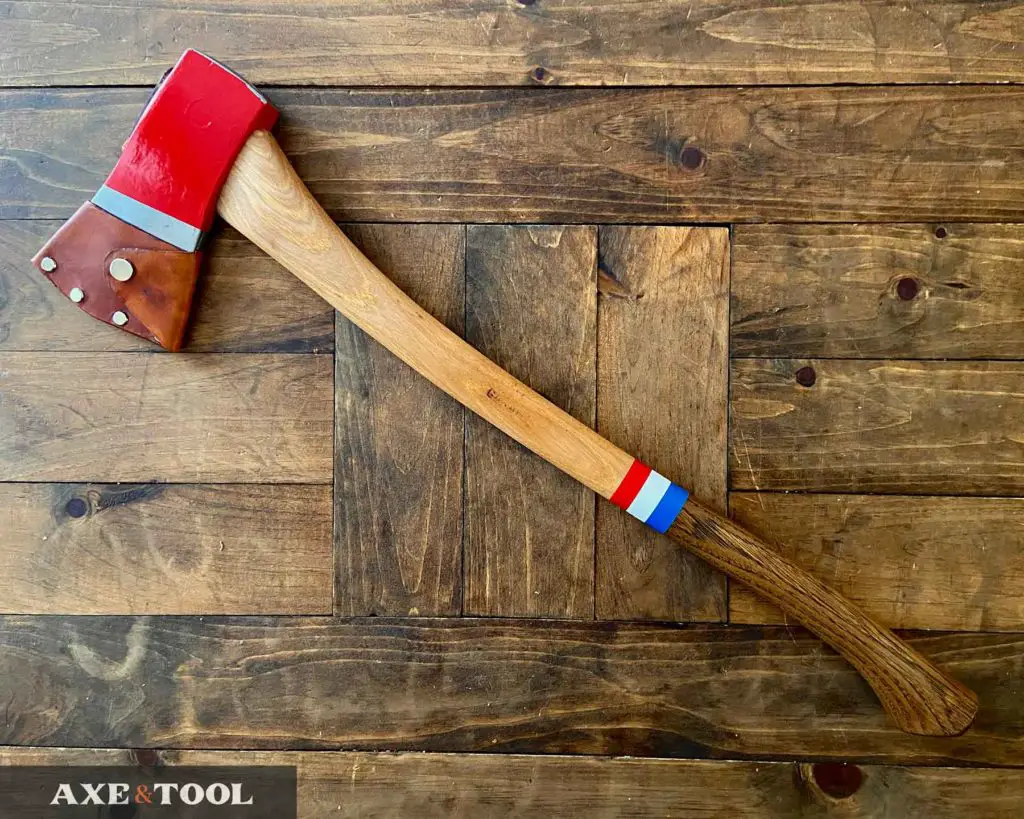
Tip: We also have an article on how to paint a custom handle.
Please comment below If I missed something or if you have any questions. I do my best to respond to everyone.
About the author:
About the author:
Jim Bell | Site Creator
I’m just a guy who likes axes. I got tired of only finding crap websites, so I set out to build a better one myself.
I’m also on Instagram: @axeandtool

I recently got into restoring an axe my dad got from my late uncle and I had so much fun doing that I started getting the tools to do it now. I recently just came across a hell of a deal at a garage sale and walked away with 4 old vintage axes. 2 double bits and 2 single bits – mostly they don’t need any restoration but I do want to paint one and start with customizing the handles. This one article was already great help for beginners! Thanks much!
It’s an addictive hobby – more will always find a way to come home with you. Thanks for the kind words – and feel free to share any tips you learn along the way, I’m still learning too.
Good tips. I agree that acetone works best. I’m about to paint a fireman’s axe head tomorrow and I’m going to add an extra step, which is to first spray a couple light coats of self etching enamel before applying the paint.
My husband (an Eagle Scout) has an old axe that he used as a Boy Scout probably 65 years ago. His grandson has become an Eagle Scout and my husband would like to give him the axe. Do you do restoration and painting of an axe and handle (it’s about 18″ long)? I read all your tips but don’t have the room (and patience) to do it myself. Can I ship you the axe?
Thanks.
Sounds like a nice piece, unfortunately I am not doing restorations or painting for people right now. I am too backlogged right now.